Webhook Module
- 17 Dec 2024
- 2 Minutes to read
- Contributors

- Print
- DarkLight
- PDF
Webhook Module
- Updated on 17 Dec 2024
- 2 Minutes to read
- Contributors
- Print
- DarkLight
- PDF
Article summary
Did you find this summary helpful?
Thank you for your feedback

Ushur provides customers with an interface with any API service using the Outbound Webhook module. This module enables API-based integrations from Ushur to any REST-based system. This module makes HTTP requests such as Get, Post, Delete, Patch, or Put. It gets responses, parses them, and saves them in Ushur variables or metadata for further processing.
Note
Outbound webhooks can be used to interface with CRM software or utilize the Ushur API capabilities from within the platform. For instance, you can send requests using Outbound Webhook to save user preferences inside a database.
Configuring the Outbound Webhook Parameters
The Webhook module can be configured for either the Outbound or the Inbound direction specification. If you toggle between the configuration tabs, the previous configuration specifications will be lost. To configure the Webhook module, follow the steps below:
From the Modules list, drag and drop the Webhook Module into the Inspector Panel and double-click to open the configuration window.

From the API method drop-down select the HTTP method to be used.
Enter the complete URL Endpoint, which is the API’s REST destination URL
Configure the Timeout seconds value after which the link should time out.
Best Practice
Ensure it is between 0-30 seconds, and add only numerical.
If you want to add query parameters, click Edit request body, and select the Request content type Key and Value for the parameters from the table. Click Add to add a new key and value parameter information.
.png "image(110).png")
Click Save.
If you want to add additional Request Header information, click to add your information. Click Add to add new information.
.png "image(111).png")
If you want to add additional If you want to add key details and values in the Request Headers box, enter the Key and Value for the headers in the different boxes. Click Add to update additional keys.
.png "image(112).png")
In the Expected response status field under the Response Details section, enter individual codes (e.g., 100, 235) or ranges (e.g., 300-350). The system accepts codes from 100 to 599, codes outside this range will prompt an error message.
Select the type of response that is required from the Expected Response Content type dropdown list:
text/plain
text/HTML
application/JSON
asset
Save the responses or add the keys for tags from the Save Variables from Response dropdown list. Click Edit table to add new Save response values and click Save.


.png "image(110).png")
.png "image(111).png")
.png "image(112).png")

Note
Tags can be used to store key values from the API response to Ushur’s local or enterprise variable. Local and enterprise variables can also be used as parameters in the body of the API.
Use Check box to select Retry on Failure (Callback URL) option under Error Handling section.


Configuring the Inbound Webhook Parameters
Use this webhook to emit an event in an external system, and inbound webhook to check whether an event has occurred.
To configure, follow the steps below:
Slide to the Inbound toggle.
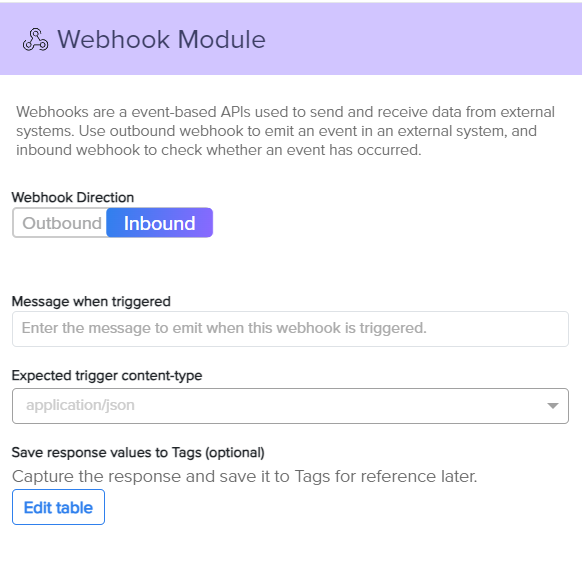
Modify the specific message to be displayed in the Message when triggered text box.
Select the content type from the Expected trigger content-type dropdown list. The type can be plain text, text/HTML, application/JSON, or asset type.
Tag the responses or add new tags in the Save response values to tags table.
Click Save.

Was this article helpful?