Implementation Guide for eSign through QuicklySign
- 03 Jul 2024
- 3 Minutes to read
- Contributors

- Print
- DarkLight
- PDF
Implementation Guide for eSign through QuicklySign
- Updated on 03 Jul 2024
- 3 Minutes to read
- Contributors
- Print
- DarkLight
- PDF
Article summary
Did you find this summary helpful?
Thank you for your feedback
Overview of eSign Solution
Ushur enables the 3rd -party authorization via e-Sign to help customer with easy steps and promotes frictionless, audit-ready engagement for the agents.
Often, the business protocol may require additional verification such as customer signature on documents, inclusion of third party or a beneficiary, consent form or signing a simple application form. In these instances, the customer typically receives an email with the signatory document attached that needs to be opened, signed, and attached back to the email so that a claims specialist or support person can attach it to the case file. This is a time-consuming and manual process. which could lead to friction for the customer and additional lag time for the business.
In today’s world, customers are used to speed and convenience, and any process that does not deliver swift solutions is worsens the customer satisfaction index. It also reduces operational efficiency as businesses typically must send follow-ups to make sure the eSign process is complete.
Ushur’s integration-friendly, seamless Invisible App environment allows business and technical teams to streamline this entire process. Regardless of the customer engagement, the signing process can be completed in few seconds without additional demands on the customer action. The engagement is also time stamped for audit availability and can be verified by specialists.
Ushur can integrate with any eSign platform and the below is an example for QuicklySign.
Implementation
There are two main phases involved during the implementation of an eSign solution:
Form Setup
In this phase, template documents are uploaded, and form fields are customized in QuicklySign. Once you have a business or enterprise account with QuicklySign, follow the procedure below:
Login into QuicklySign.
Click on Documents.
Click New Document and select Upload a new document.
Configure the required fields such as text, signature, email notification etc.)
Click the arrow near Request Signature and select Convert to template.
Setting up the Ushur
Ensure to design the workflow based on the business use case. The following API’s must be called in the webhook module.
Generate Access Token
In the Ushur workflow use the Outbound webhook module to configure QuicklySign API. Call the API below to obtain the Access Token:
Method – POST
URL – https://pps-api.quicklysign.com/v1/access_tokens

Body –
{
  "client_id":"",
  "client_secret":"",
  "api_key":""
}
Generate a new document from the template
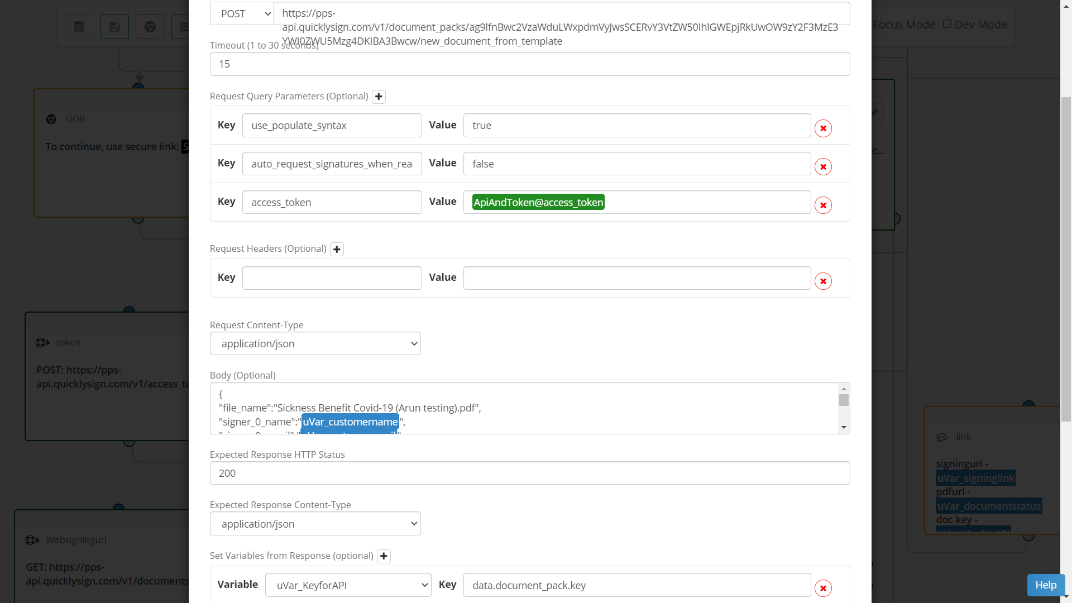
The Ushur workflow uses the Outbound webhook module to configure the QuicklySign API. Call the API mentioned below, which will generate a new eSign document from the template we created in Form Setup. This API can inject values into the fields (from the Ushur variable or Enterprise variable).
Method – POST

URL – https://pps-api.quicklysign.com/v1/document_packs/{{TemplateID}}/new_document_from_template

Parameters –

access_token – {{access token}}

use_populate_syntax – true

auto_request_signatures_when_ready – true/false (set this to false if Esigning should happen through Ushur IA)

Body –

{

"file_name": "Sickness Benefit Covid-19.pdf",

"signer_0_name":"Signer name",

"signer_0_email":"Signer email",

"signer_0_mobile_number" : "Signer phone number",

"qs:text_5NZ4wU" : "Ushur variable",

"qs:date_M8FIK7" : "Ushur variable",

"qs:date_HLShxm" : "Ushur variable"

}
Data to be captured from response –
Key - data.document_pack.key
Customeruuid - data.document_pack.signatories.uuid
Generate the Signing URL
The signing URL must be generated and for the customer to sign the document within the Ushur Invisible App. Use the below API in the Outbound webhook module to generate a signing URL.
Method – GET

URL - https://pps-api.quicklysign.com/v1/documents/{{KeyGeneratedfromperviousapi}}/generate_in_app_signing_url/{{CustomerUUIDGeneratedfromperviousapi}}?

Parameters –

access_token – {{access token}}

signer_is_validated – true

signing_page_url – https%3A%2F%2Fppsdev.ushur.io

Data to be captured from response –

signing_link - data.signing_link

Setup message module to handle Iframe

In this we shall enable the customer to Esign the document through Ushur Invisible APP and the below code needs to be inserted in the message module.

<script src='https://dev.quicklysign.com/public/widgets/embed.widget.latest.min.js'></script>

<div id='containerQuickly'></div><script defer>setTimeout(function(){QuicklySign.init('ag9lfnBwc2VzaWduLWxpdmVyGAsSC0FwcGxpY2F0aW9uGICAgPTTmv0JDIBA3Bwcw');QuicklySign.open({url:'{{insert signingurl}}', container_id:'containerQuickly',message_listener: function(event_data){if(event_data.event === Quicklysign.EVENTS.SIGNED) {alert('document signed');}},post_sign_url:''});},2000);</script>
Fetch the document details
We can check and fetch information about signed documents with the below API, which helps in identifying the current status of the document and obtain details provided by the customer during the signing process. The captured details can be saved
Method – GET

URL - https://pps-api.quicklysign.com/v1/document_packs/{{KeyGeneratedfromfirstapi}}?

Parameters –

access_token – {{access token}}

Data to be captured from response –

serve_pdf_url - data.document_pack.documents.serve_pdf_url

status - data.document_pack.status

custom_id – data.document_pack.documents.data_fields.custom_id

data - data.document_pack.documents.data_fields.data
Screenshot of the Esigning through Ushur Invisible App. For more details on QuicklySign API, please click here.


Was this article helpful?