Human-in-the-Loop Feature
- 20 Mar 2025
- 5 Minutes to read
- Contributors

- Print
- DarkLight
- PDF
Human-in-the-Loop Feature
- Updated on 20 Mar 2025
- 5 Minutes to read
- Contributors
- Print
- DarkLight
- PDF
Article summary
Did you find this summary helpful?
Thank you for your feedback
Overview
On the data review page, the user can view the extracted data that are received from the engagement. It is a Human-in-the-Loop (HITL) feature that allows users to review and edit the extracted data. It also allows the user to add additional data that is relevant to the user before moving to the next stage.
.png "image(292).png")
Data Review Page
Follow the below steps to navigate the data review page:
The Workflow drop-down menu displays the workflow of the displayed engagement. You can navigate back to the Data Validation page by selecting the applicable workflow.
.png "image(295).png")
You can access other engagements initiated within the same workflow from the drop-down menu.
.png "image(296).png")
The review page has a two-column layout. The left panel displays extracted data with corresponding labels, and the right panel shows the source of the extracted data such as email, DOC or DOCX, XLSX, and PDF attachments (native PDFs and scanned PDFs). The left panel displays three tabs:
.png "image(297).png")
Extracted Data tab: Select this tab to display the extracted data from the source which is email and the pdf attachments. Users can locate the data on the source just by clicking the appropriate field.
.png "image(298).png")
Data in Review tab: Select this tab to display the data marked with a low confidence badge, indicating the need for human review before proceeding.
All Data tab: Select this tab to view all extracted data and optional fields with predefined labels.
The below-mentioned three fields will now be displayed at the top of the all the tabs by default:
First Name
Last Name
Date of Birth
These fields will be pinned to the top regardless of whether they contain values, ensuring consistent visibility and access for all documents.
.png "image(295).png")
.png "image(296).png")
.png "image(297).png")
.png "image(298).png")
Advanced Options
The Data Review page has additional features that enable the user to search, filter, and review the data efficiently, those features are:
Search Icon
Use the search
.png "image(293).png") icon to find specific values in the extracted data.
icon to find specific values in the extracted data.
Color-coded flags
The color-coded flags marked on the data field are based on the below-mentioned conditions:
Flags
Keys


Low confidence Badge
The low confidence
.png "image(294).png") badge is used to indicate data in the Ushur system that has been predicted with low confidence and may not be accurate. The fields with low confidence badges should be reviewed and modified by humans if necessary to ensure accuracy. For more information on how to read the confidence badge, refer to How to understand Ushur Confidence Levels?.
badge is used to indicate data in the Ushur system that has been predicted with low confidence and may not be accurate. The fields with low confidence badges should be reviewed and modified by humans if necessary to ensure accuracy. For more information on how to read the confidence badge, refer to How to understand Ushur Confidence Levels?.
Default Values
Default values
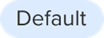 ensure that important key/value fields are always present, even when they are missing from the extracted document. These values are pre-configured at the backend and help maintain data consistency.
HITL assigns default values in the following ways:
If an pre-defined key/value field is missing from the extracted document, HITL automatically adds it with a default value.
If a field exists in the extracted document but has a different value than the default, HITL adds a row under the key, displaying the extracted values. User can change the values to default by clicking the More icon and click Set to default.
If a field exists in the extracted document and matches the default value, HITL displays it without any changes.
Default values are marked with a Default
 badge.
Some default values may not have a file association if they were added due to missing extracted data. However, if a field was extracted from a document and assigned a default value, its associated file will be displayed above the field.
Note
Default values are configured at the backend. To modify or update them, contact the Customer Support Manager or SRE.
Adding and Managing Default Values
If a pre-defined key/value field is missing in the extracted document, HITL automatically adds the field with a default value, marked with a Default
badge.To manually associate a default value with a file or to add a new entry for another file:
Click the + (plus) button labeled "Add Entry for Another File".
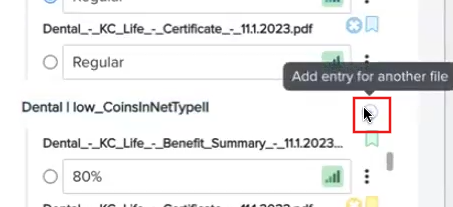
In the Add Record dialog box, select a file from the dropdown list.
Click Add Field to save the association.
If the file is associated with an existing field, the file name appears above the field.
If a new entry is added for a another file, the system creates a new row and displays the associated file name above the field.
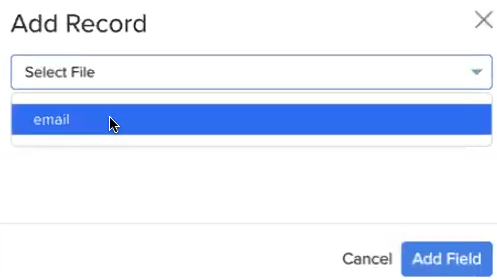
Click the More icon and the perform the following actions:
Set to Default – Replaces the current value with the system-configured default value. This option is available only for fields that do not already have a default value.
User can also reset the edited value to the original value by clicking the Reset icon.
Default values can be edited. If edited, the Default badge is removed.
Selecting Values Using Radio Buttons
Fields with multiple values display radio buttons for selection.
Using radio buttons, users can select the most relevant value from the available options.
If a field is Unknown or Empty, users can manually enter a value and associate them with a file.
The selected value is saved and used as the final confirmed data.
 ensure that important key/value fields are always present, even when they are missing from the extracted document. These values are pre-configured at the backend and help maintain data consistency.


Review Actions

Abort – Cancels the review process and discards any unsaved changes. If confirmed, extraction stops, and the workflow execution remains incomplete.
Save (X) – Enables only when a manual edit is made. Saves the changes without submitting them. The number in parentheses indicates the count of unsaved changes. Saved changes can be reviewed and modified before submission.
Submit – Finalizes and submits all saved changes for processing. Once submitted, changes become part of the final workflow execution.
How to review and correct the data using the Human-in-the-Loop feature?
Navigate to Dashboard > Data Validation tab.
From the Workflow drop-down menu, select the relevant workflow.
Once you select the workflow, the data summary table provides a detailed summary of workflow engagements.
.png "image(299).png")
Select the engagement where the status is marked as Requires Review.
On the Data Review page, click the Data in Review tab on the left panel. The data fields available under this tab need to be reviewed and edited if necessary.
Click the data fields to locate the source of the data from the email, DOC or DOCX, XLSX, or PDF that is displayed in the right panel.
Note
All the word files (DOC or DOCX) will be auto rendered to PDF at the backend. The tab name displayed on the right panel will be in this format [Filename.pdf].
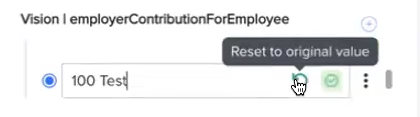
Click the field to edit the value. The Value-Modified
.png "image(300).png") icon will be displayed.
icon will be displayed.To reset the field's value to its original extracted value, click the Reset
.png "image(301).png") Icon displayed on the right of the field.
Icon displayed on the right of the field.Once you complete the changes, click the Submit Changes
.png "image(302).png") icon. The Submit Changes icon displays the total number of changes.
icon. The Submit Changes icon displays the total number of changes.
.png "image(299).png")
Note
If no changes are required, use the More
icon on the data validation summary table to complete the submission.
If you submit the changes before reviewing all data, a confirmation message will appear with the count of pending reviews. You can then click the Complete Review icon to finish or cancel.
.png "image(304).png")
If all the fields are addressed, click the Complete Review icon to proceed with the pending workflow execution.
.png "image(305).png")
.png "image(304).png")
.png "image(305).png")
Note
When making edits to data fields, ensure that the values are input in the format required by the final system processing the extracted data.
For instance, if you need to change a field value from "$7,500" to "$8,000", enter it as "8000" if the system accepts only numeric values without symbols or commas.
It's important to adhere to these format requirements, as any deviation will not be automatically adjusted and may lead to data inconsistencies.
 It's important to adhere to these format requirements, as any deviation will not be automatically adjusted and may lead to data inconsistencies.
Was this article helpful?