Canvas User Interface
- 28 Feb 2025
- 4 Minutes to read
- Contributors

- Print
- DarkLight
- PDF
Canvas User Interface
- Updated on 28 Feb 2025
- 4 Minutes to read
- Contributors
- Print
- DarkLight
- PDF
Article summary
Did you find this summary helpful?
Thank you for your feedback
The Canvas interface provides an intuitive UI to enable you to build your use cases utilizing conversational apps and the Invisible app. The Canvas experience provides the user with the ability to perform high-level canvas functions that are intuitive and easy to use and enhance the user experience. The Canvas interface is designed to provide users with an efficient way of designing, visualizing, and using various functionalities to build the workflow.
The Canvas menu provides you with features that make you navigate through various functions while building a workflow.
.png "image(55).png")
The Canvas Utility toolbar provides the following options to help you navigate and perform simple tasks. Use the table below to review all the available options.
Toolbar Options and Icons
Fit to Screen
![]()
Align the entire canvas into view, to display the complete picture of the workflow.
Zoom In/Zoom Out
![]()
Zoom In / ![]() Zoom Out allows you to adjust the view to closely examine the workflow on the canvas.
Zoom Out allows you to adjust the view to closely examine the workflow on the canvas.
Translations
.png "image(718).png")
Click the dropdown menu to view the available translation languages. The selection of languages other than English will create a synced read-only workflow. To configure and enable this feature, refer to the General Setting tab.
Test Workflow
Use the built-in simulator to test your workflow before launching it. The simulator lets you interact with the workflow exactly as your end users will, ensuring everything works correctly and looks good:
Click the Test Workflow
 button to open the simulator with an SMS mobile interface.
Select the Invisible App link to open the Invisible App.
Interact with the workflow and complete the steps.
Click the Close button to exit the simulator.
Published/Unpublished

Use the toggle button to unpublish a workflow for editing before the next launch, and publish it to make it available for launching in the LaunchPad.
More Icon Workflow
|
|
.png "image(720).png")
.png "image(721).png")
Edit Workflow
The Edit Workflow option allows users to modify a published workflow by creating a draft version. Since published workflows cannot be directly edited, this feature ensures that changes can be made safely before applying them to the live workflow.
For more information, refer to Draft or Edit Workflow.
Save and Close Modules
| Save Changes:
|


Users must manually Save changes before closing a module. User can use Close button to save without the changes. If users attempt to leave without saving, a prompt ensures data is not lost. Available in all modules for a uniform experience.
Warning or Error Message

Upon clicking the icons, user can view the messages:
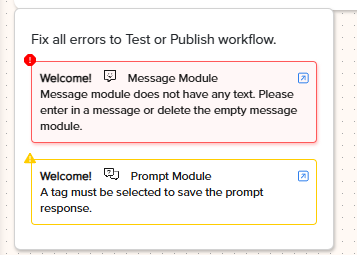
Error Messages: Indicate critical issues that must be fixed (e.g., missing required fields).
Warning Messages: Highlight potential concerns that do not block workflow execution (e.g., optional settings not configured).

Manage Goals
Click the More icon in the Canvas UI.
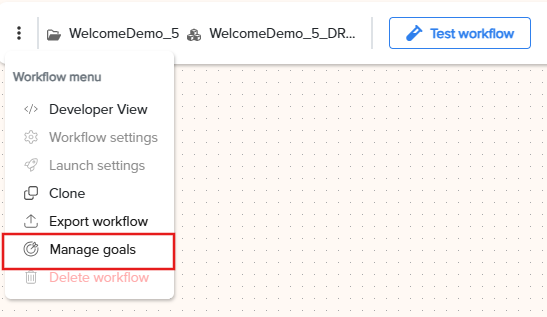
Select Manage Goals to open the goal configuration panel.

Click Assign Goal to add a new goal to the workflow.
Choose the type of goal to assign:
Exiting Goals
New Goal
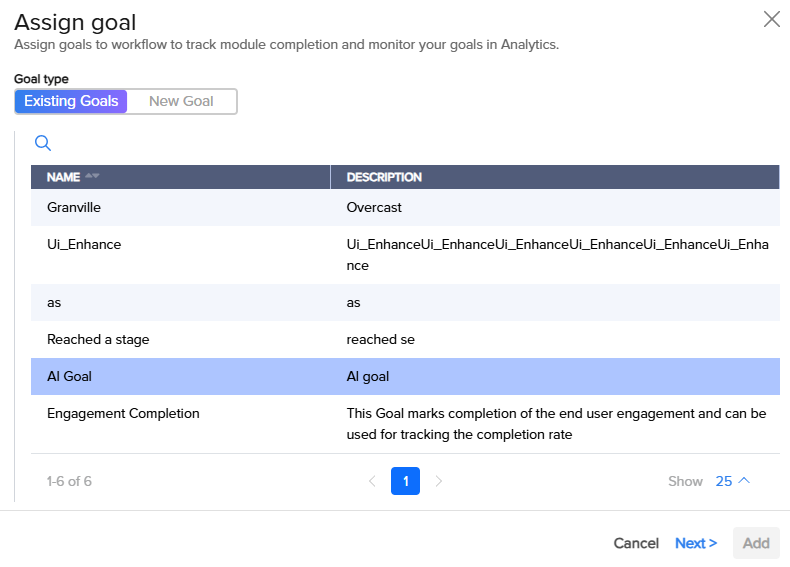
Select a predefined goal from a shared list.
Note: These goals are accessible across projects but must be manually assigned to one or more modules.
Click Next to proceed.
Assign the selected goal to one or more modules.
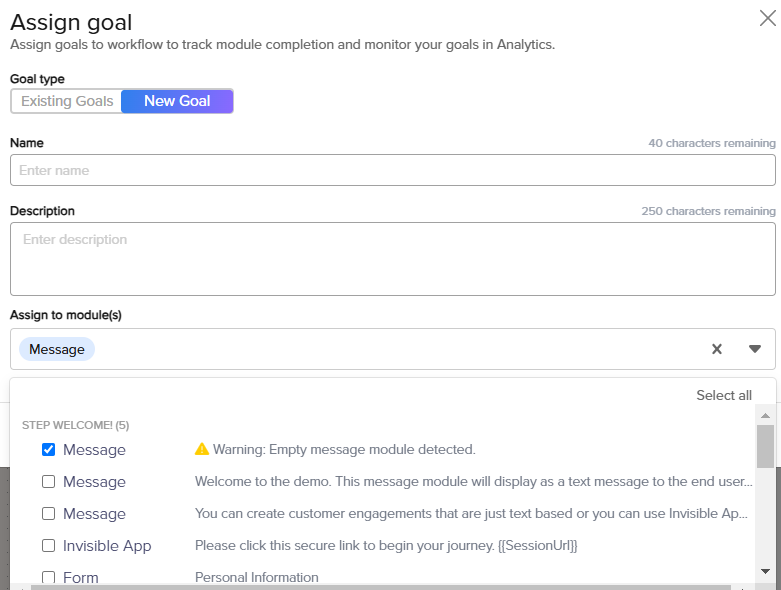
Create a custom goal by following the below steps:
Name: Enter a name for the goal. (40 characters maximum).
Description: Provide a description to the goal (250 characters maximum).
Assign to Module(s): Assign the goal to one or more modules within the current project. The modules are categorized based on workflow steps.
Click Add to save the new goal.


Once a goal is assigned:
It is displayed in the inspector panel under the Goals section.
The assigned goal appears in the Canvas UI with a goal icon on the respective step. Hovering over the Goal
 icon reveals all goals assigned to that step.
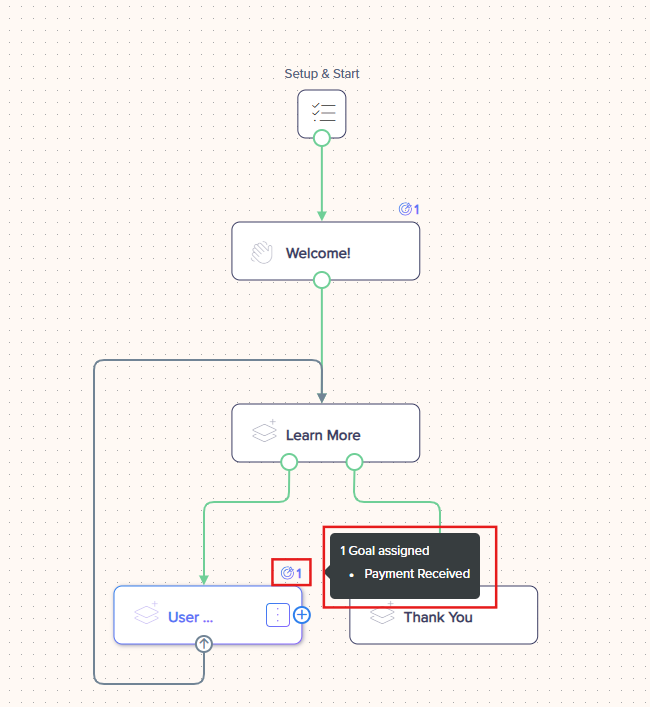
If a new goal is created, it becomes available across projects but remains unassigned by default. Users must manually assign it in other projects.

Monitoring Goals:
Users can view all assigned goals in the inspector panel and within the Insights dashboard.
Goals help track workflow progress by monitoring module completion rates.
The system visually highlights steps associated with goals, making it easier to track progress.
Branching or Adding a Step
Disable Branch Options for Navigate Modules
When using Branch or Menu modules, the "Add Branch" and "Modify Branch" options are disabled to maintain existing connections.
Branching for 'On Error' and 'On Reminder' Scenarios
Users can set branches for 'On error' and 'On reminder' cases. Only "Modify branch" and "Delete step" options are available for a streamlined approach.
Enhanced Branch Connector Modification
Hovering over a branch connector shows a blue "Edit" tooltip. The "Branch options" menu provides options to "Insert Step," "Modify branch," and "Delete Branch," making it easy to adjust connections.
Adding a Branch to Disconnected Steps
For steps not connected to others, the "Step options" menu includes "Add Branch" and "Delete Step." Users can connect to an existing step or create a new one, with validation for unique step names.


Was this article helpful?