- Print
- DarkLight
- PDF
Bulk Upload and Trigger Ushurs Using CSV File
Introduction
The "Bulk Upload and Trigger Ushurs" feature in Ushur Studio allows users to automate engagement workflows by uploading data in bulk using CSV files. This functionality enables efficient data handling and workflow management, covering key processes such as setting up datatable properties, preparing the data, uploading the CSV file, and managing the workflows triggered by the uploaded data.
Prerequisites
Before starting, ensure that the "Trigger Variables" feature is enabled. Trigger variables are prefixed with uid_. This is an Enterprise setting, contact the Customer Success team to enable it.
Note
A trigger variable is a type of variable defined by citizen developers within the Ushur platform that determines the conditions for triggering an engagement.
Bulk Upload and Trigger Ushurs via UI
Create a Project and Access Data Tables
Create a Project: Start by creating a new project or selecting an existing project in Ushur Studio.
Navigate to Data Tables:
In the left-hand menu, select Data Tables under the "Manage" section.
Choose your project from the dropdown menu (e.g., DataTableUpload).
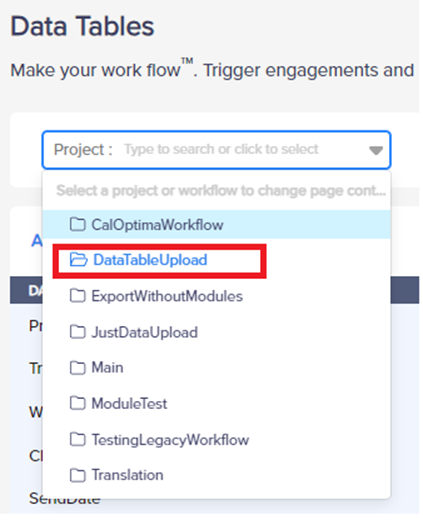
Define Datatable Properties
Add Properties:
Click on the Properties tab, then select Add data > Add Property to define new properties.
Mandatory Properties
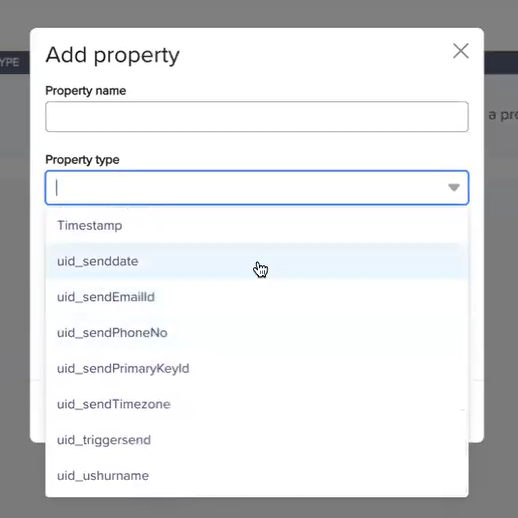 Create the following variables:
PrimaryKey: The unique identifier for the remote enterprise.
Property Name: Enter a recognizable alias like "PrimaryKey."
Note
The Property Name field does not allow spaces between characters or words.
Suggestion: Use Underscores (_) to replace spaces.
Property Type: uid_sendPrimaryKeyId
Description (Optional): Enter applicable description of the variable.
TriggerSend: A string boolean indicating indicating whether to trigger an action for the data entry.
Property Name: Use an alias like "TriggerSend."
Property Type: uid_triggersend
Description (Optional): Enter applicable description of the variable.
Workflow: Specify the name of the Ushur workflow to be launched.
Property Name: Name the workflow for clarity.
Property Type: uid_ushurname
Description (Optional): Enter applicable description of the variable.
Optional Properties:
The below properties are examples properties, you can alter the optional properties according to your requirements.
ClaimID: For identifying claims or unique entries. Accepts a continuous sequence of numbers and letters.
Property Name: Can be set as "ClaimID."
Property Type: Alphanumeric
Description (Optional): Enter applicable description of the variable.
Note
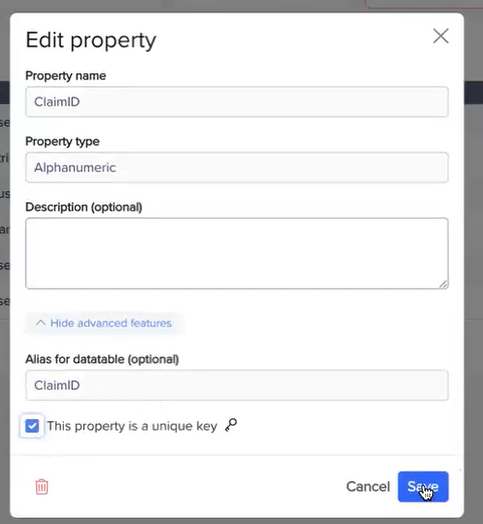
In the Add Property dialog box, under Show Advanced Features option, select This property is a unique key option for at least one unique property. In the above example, ClaimID is selected as Unique Key
 .
.
SendDate: Specifies when the workflow should be triggered. If left blank, the workflow triggers immediately.
Property Name: Use "SendDate."
Property Type: uid_senddate
Description (Optional): Enter applicable description of the variable.
Note
If this variable is not created, then Ushurs will be triggered immediately.
Use this field only to schedule Ushurs at a future date.
The values should be provided in “MM/DD/YYYY HH:MM AM/PM” format only.
PhoneNumber: The contact number associated with the entry, with a default country code option.
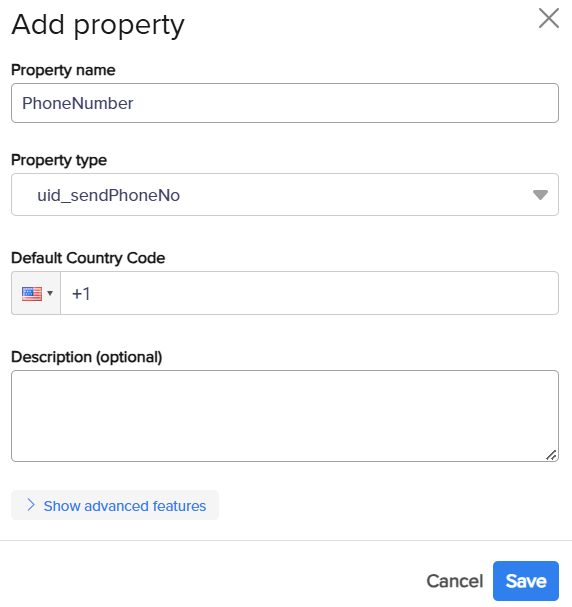
Property Name: Set to "PhoneNumber."
Property Type: uid_sendPhoneNo
Default Country Code: From drop-down, specify the default country code (e.g., +1 for the United States). This field appears only when the property type is set to uid_sendPhoneNo.
In the property table, users can view the assigned country code by clicking the "i"
 icon.
icon.
Download the Sample CSV File
Download Template:
Navigate to Add Data > Upload Data > Download by Type > CSV file.
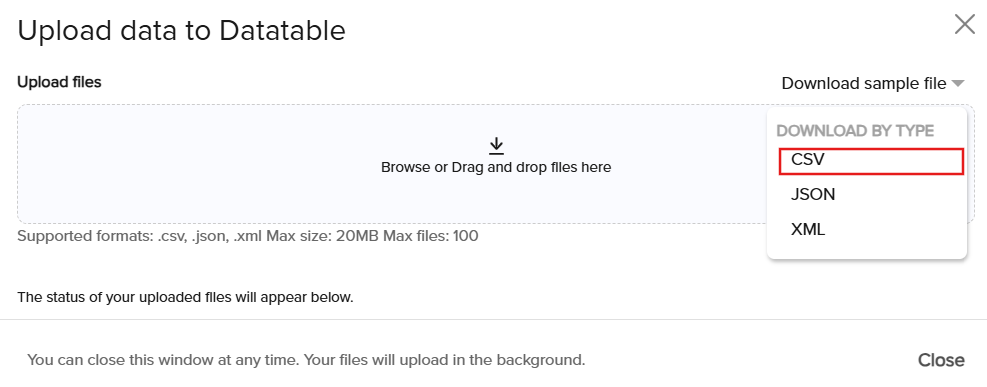
Note: User can also download the sample file in JSON and XML formats.
This template includes the necessary headers corresponding to the properties defined in your datatable. Ensure to remove any sample data and format your entries according to system requirements.
Populate the CSV File
To populate the CSV file with the necessary data, do the following steps:

PrimaryKey: Provide unique identifiers for each row to ensure distinct records.
TriggerSend: Indicate whether to trigger the action using "Yes" or "No".
Workflow: Enter the name of the workflow that the data should trigger.
ClaimID: Use this for unique claim identifiers, if applicable.
SendDate: For scheduling the workflow, use the format MM/DD/YYYY HH:MM AM/PM. Note: Leaving this field blank triggers the workflow immediately upon approval.
PhoneNumber: Enter phone numbers, including the country code if available. If omitted, the system uses the default country code set in the datatable properties. The system automatically corrects data issues, such as removing special characters from phone numbers.
Upload the CSV File
Upload Process:
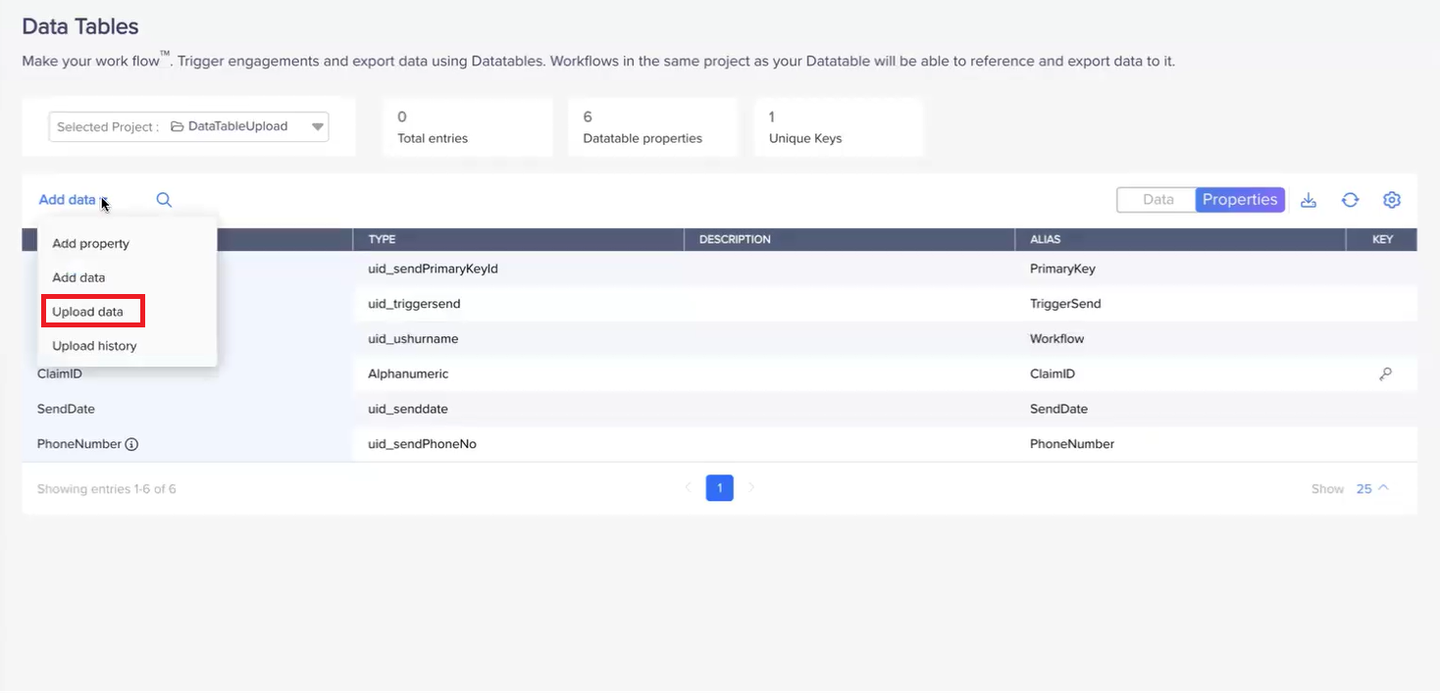
Go to the Data Tables section, navigate to Properties > Add Data > Upload Data.
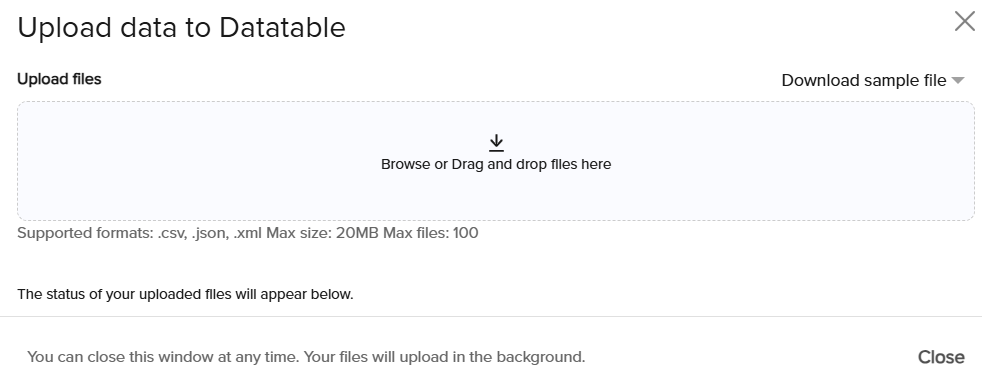
Select and upload the prepared CSV file. The system now provides toast notifications to confirm the upload status, indicating success or any errors encountered.
Notes
Supported File Formats:
.csv
.json
.xml
Maximum File Size: 20MB
Maximum Number of Files: 100
For a larger file size, we recommend using the SFTP upload method.
Approve and Launch the Workflow
Review and Approval:
After uploading, proceed to Launchpad > Triggered Launches.
Select the relevant project (e.g., DataTableUpload).
You can view the uploaded CSV file in the Summary table with the status Needs Approval.
View Launch Summary:
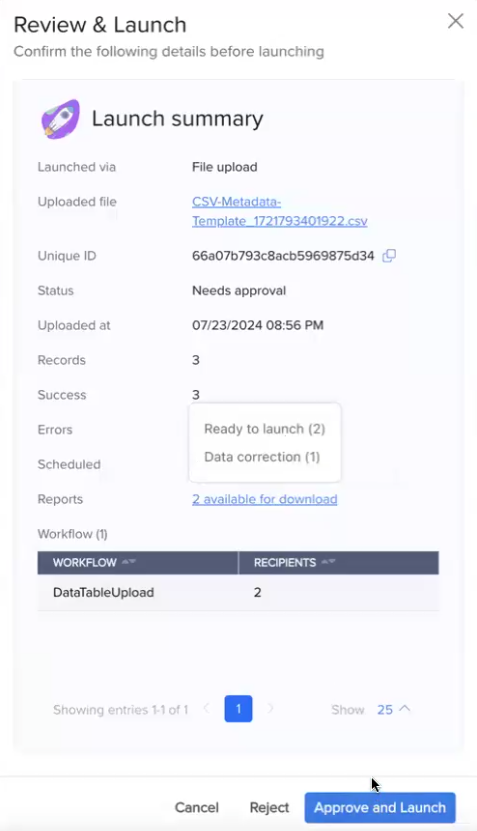
Click on More Icon and select View Launch Summary.
You can view the launch summary to verify the records before final approval. This summary includes the following details:
Launched via: Indicates the method used to upload the file (Upload UI or SFTP).
Uploaded file: The name of the uploaded CSV file. Click the hyperlink to download the uploaded file.
Note
Download option is an Enterprise Setting. Contact your customer success team to enable.
Unique ID: A unique identifier for the workflow. Click the Copy Icon to copy the unique identifier for the workflow.
Status: The status of the workflow.
Uploaded at: The date and time when the file was uploaded.
Records: The total number of records in the file.
Success: The number of successfully processed records and also indicates the number of duplicate records.
Errors: The number of errors encountered.
Scheduled: The number of launches scheduled for a future date.
Reports: Options to view and download reports related to the workflow. Click to see the list of available reports, that are
Ready to Launch: Displays number of Workflows that are ready to launch. Select the reports to download in .csv format.
Data Correction: Displays the number of workflows that are undergone data correction. Select the reports to download in .csv format.
Note
This option is an Enterprise Setting. Contact your Customer Success Manager to enable.
Approval Confirmation:
Confirm the approval by clicking on the Approve and Launch button. This will process the records and initiate the workflows as defined in the CSV file. This step is crucial for UI uploads to prevent unintentional workflow triggers. For more information on Triggered Launches, refer to Triggered Launches.
Bulk Upload and Trigger Ushurs via SFTP
The SFTP (Secure File Transfer Protocol) method provides an alternative way to upload CSV files to Ushur Studio. This method is beneficial for automated workflows, especially when handling large datasets. To enforce manual approval, enable it in the enterprise settings. Contact your Customer Success Manager to enable it
Configure SFTP Connection
Access SFTP Settings:
Navigate to the Settings > SFTP section in Ushur Studio, where SFTP configurations are managed. To configure the SFTP connections, refer to the SFTP Connections.
Upload CSV Files via SFTP
Prepare CSV File:
Follow the same preparation guidelines as for manual uploads. Ensure the CSV file includes all required fields (PrimaryKey, TriggerSend, Workflow, etc.).
Upload the CSV File:
Use an SFTP client (such as FileZilla, WinSCP, or command-line SFTP) to connect to the server.
Navigate to the configured directory and upload the prepared CSV file.
File Handling Post-Upload:
Once the CSV file is uploaded to the specified directory, Ushur Studio processes the file. The system may move the file to an archive directory or delete it after processing, depending on your configuration settings.
Manage SFTP Uploaded Data
Approval Process:
By default, SFTP uploads may not require manual approval. This setting can be altered. Contact your Customer Success Team to enable it.
If approval is required, go to Launchpad > Triggered Launches, and select the project (e.g., DataTableUpload).
The uploaded file will be listed with its status. If manual approval is needed, the status will show "Needs Approval."
Click on More Icon and select View Launch Summary.
Click on Approve and Launch to initiate the workflows for the uploaded data entries.
Configure SFTP Workflow Processing Rate
To ensure the efficient and controlled execution of workflows triggered by files uploaded via SFTP, the Ushur Platform supports rate limiting. This feature helps manage the load on the platform by controlling how many files are processed over a specified time interval.
Example: If 500 files are uploaded to an SFTP Workflow directory, instead of triggering all workflows simultaneously, the processing will be spread out over time. For instance, if the rate is set to 10 files per minute in the Enterprise Settings, the workflows for all 500 files will be launched over 50 minutes.
Contact your Customer Success Manager (CSM) or Site Reliability Engineers (SREs) to configure the processing rate.


 Create the following variables:


