Branch Module
- 15 Jul 2024
- 3 Minutes to read
- Contributors

- Print
- DarkLight
- PDF
Branch Module
- Updated on 15 Jul 2024
- 3 Minutes to read
- Contributors
- Print
- DarkLight
- PDF
Article summary
Did you find this summary helpful?
Thank you for your feedback

The Branch module changes the execution of the workflow to one of multiple exit branches based on the resolution of a condition. Users can determine the variables and conditions to test, and then branch the workflow to a specified module based on the test conditions.
The Branch module can comprise a series of one or more sub-conditions made up of two values and a comparison type. Ushur will compare these two values to determine whether a condition is met. If those conditions are met then the steps on the True branch will run. If they are not met then the steps on the False branch will run.
The Branch module is used to compare a variable with another variable or a set value. The module allows you to evaluate and configure conditional blocks based on the variable is equal to, not equal to, less than or equal to, greater than, greater than or equal to, or contains another variable or value. Based on the return value of these conditions, you can configure how the branch will flow further to the next module.
To configure the branch module, follow the steps below:
Drag-drop the Branch module to the Inspector Panel and double-click to configure the details.
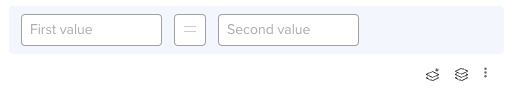
.png "image(121).png")
Click the First Value Field and Select a tag from the drop-down that displays the lists all available tags, datatable properties, and global values.
Specify the operation from the dropdown.

Enter the Second value or add a tag using the prefix “{{“.
Specify the Conditional Block conditions and then select the Branch to drop down to select which module the flow will lead to.
To add multiple Conditional blocks click Add another condition block.
To ease the workflow to a logical branch when no conditions are met, click and select the module from If no conditions are met, branch to drop-down list.
Set the Error Limit and then select from the Branch drop-down where the flow will continue after the error limit has expired.
Close the Branch module to save the configuration details.
.png "image(121).png")

Configuring Nested Conditional Groups
You can specify 3 nested groups in a single conditional block. Follow the steps below:
Configure the first conditional block and hover around to view the Add Condition option as shown below:
By default, the AND condition will be displayed. Hover around this to change to the OR condition.
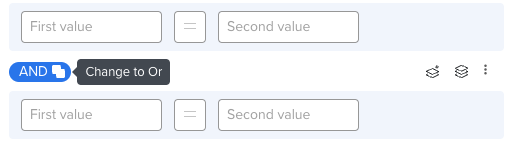
Configure the conditional block values according to specific scenarios. A group of nested blocks will look like this:
.png "image(122).png")


.png "image(122).png")
Once users execute a workflow with a Branch module in Ushur Studio, the Activity Summary will display a concise status of the Branch module's actions in Campaign Analytics.

Users will see:
Branch Module Status: A brief status indicating the successful execution of the Branch module and whether conditions were met.
To access specific details about the conditions evaluated by the module, users can choose to expand the module section. Upon expansion, the following information will be displayed:
Branch Condition Details: Each branch condition within the module, including:
Condition Number: Each condition is numbered sequentially (e.g., Condition #1, Condition #2).
Defined Parameters: The parameters defined for each condition.
Result Status: The result of each condition, displayed as TRUE or FALSE.
Branch Destination: The specific step or module the workflow branched to based on the condition's result.
Errors (if any): Any errors encountered during condition evaluation or branching.
Example Scenarios:
Condition Met Expanded:
Displays each condition and its evaluation details.
Shows the result of each condition (TRUE or FALSE).
Indicates the branching path taken when the condition is met.
Condition Not Met:
Indicates that no conditions were met.
Shows the default branch action taken when conditions are not met.
Loop Error Limits:
Displays the error limit reached for conditions.
Shows the default branch action taken when errors occur.
By reviewing this detailed information, users can gain a clear understanding of how their workflow executed, which conditions were met, and the paths taken by the workflow. This transparency helps in troubleshooting and optimizing workflows effectively.
Was this article helpful?