SFTP Report Transfer
- 27 Jan 2025
- 2 Minutes to read
- Contributors

- Print
- DarkLight
- PDF
SFTP Report Transfer
- Updated on 27 Jan 2025
- 2 Minutes to read
- Contributors
- Print
- DarkLight
- PDF
Article summary
Did you find this summary helpful?
Thank you for your feedback
Overview
The SFTP transfer for reports feature introduces a robust and secure mechanism for exporting reports to external servers using the Secure File Transfer Protocol (SFTP). This enhancement streamlines the delivery of scheduled reports, automating the process of dropping reports directly into customer-specified SFTP locations. This streamlined process eliminates the need for users to manually access the reporting Ushur platform, providing a convenient and efficient way to receive periodic reports at scheduled intervals. With this feature, users can easily configure SFTP folders for their reports, fostering a more seamless and automated reporting experience.
Enable SFTP Connections for Reports
Contact your Customer Success Manager to enable this option for your profile.
Add or Edit SFTP Connections for Reports
To add or edit an SFTP connection, the IT admin or Enterprise Admin should follow these steps:
Navigate to Dashboard > Settings > SFTP Connections for Reports.
.png "image(280).png")
Add SFTP connections:
In the SFTP Connections for Reports tab, click Add SFTP to create a new SFTP connection.
Enter the necessary parameters in the Add SFTP Connections window:
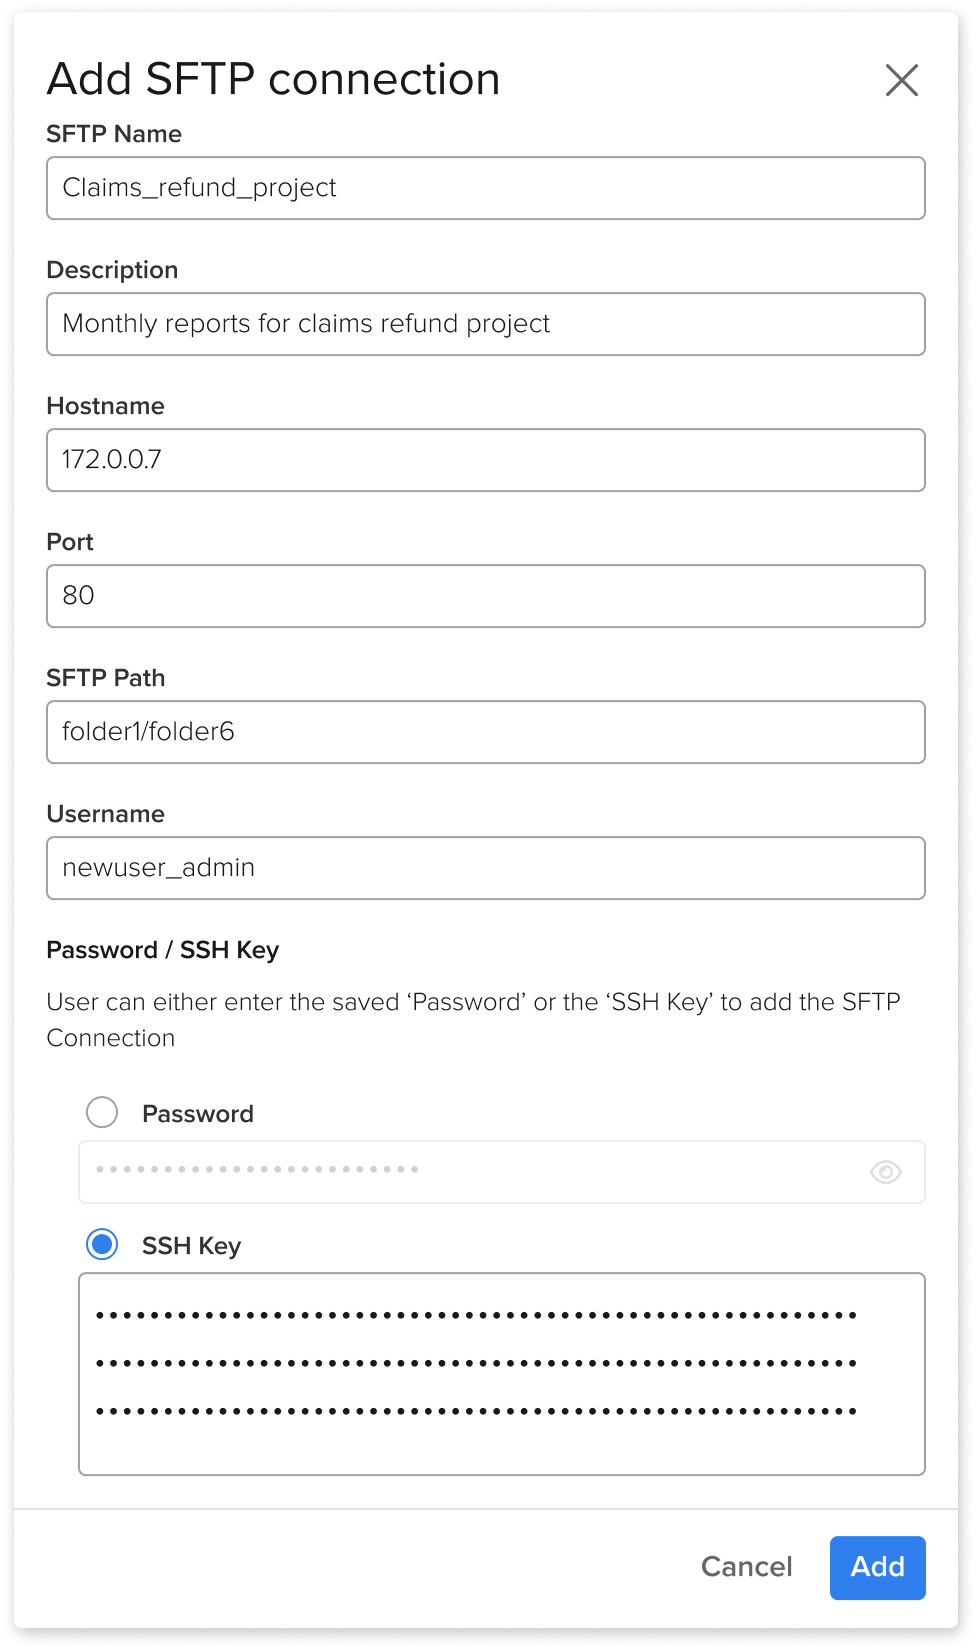
Field Name
Description
SFTP Name
The user-defined label for a specific SFTP configuration.
Description
The text field for additional notes or context regarding the specific SFTP configuration.
Host Name
The IP address or network address of the server hosting the SFTP service.
Port
The network port number used by the SFTP server. The default port for SFTP is 22, but it can be changed by the server administrator.
SFTP Path
The specific directory or folder on the SFTP server where you want to access or transfer files.
Username
The valid username associated with their account on the SFTP server to establish a secure and authorized connection.
Password
The valid password associated with the provided username ensures secure and authorized access during SFTP connections
SSH Key
The valid private SSH key (256–512 characters) with the provided username ensures secure and password-free authentication with the SFTP connections.
Click Save to add a new SFTP connection.
Edit SFTP connections:
In the SFTP Connections for Reports tab, click the applicable connection from the SFTP summary table.
Modify the necessary parameters in the Edit SFTP connection window:
Field Name
Description
SFTP Name
The user-defined label for a specific SFTP configuration.
Description
The text field for additional notes or context regarding the specific SFTP configuration.
Host Name
The IP address or network address of the server hosting the SFTP service.
Port
The network port number used by the SFTP server. The default port for SFTP is 22, but it can be changed by the server administrator.
SFTP Path
The specific directory or folder on the SFTP server where you want to access or transfer files.
Username
The valid username associated with their account on the SFTP server to establish a secure and authorized connection.
Password
The valid password associated with the provided username ensures secure and authorized access during SFTP connections
SSH Key
The valid private SSH key (256–512 characters) with the provided username ensures secure and password-free authentication with the SFTP connections.
Click Save.
.png "image(280).png")

Was this article helpful?