- Print
- DarkLight
- PDF
Self-Serve User Management
Self-Serve User Management enables external organization administrators to efficiently onboard, offboard, and manage user access within their organization, driving operational efficiencies for enterprises
Configure the User Management Use Case in Hub Settings
The User Management comes with a built-in workflow that allows external admins to add, view, and manage users within the Ushur Hub. External Admins can manage only within their organization. You can configure which roles can access this use case when setting permissions in the Roles & Users tab.

Note
By default, the User Management use case title appears on the first tile. Users can rearrange the tile positions later by drag and drop.
Navigate to the Use-Case tab
Ushur Platform (Legacy): Go to Dashboard > Portal Settings > Use-Cases tab.
Ushur Studio: Go to Dashboard >Ushur Hub > Use-Cases tab.
Configure the User Management
Select the User Management tile. The layout is divided into two columns:

Left Column
Use-Case Name is pre-configured and cannot be changed.
By default, the User Management icon is pre-configured. To update it, drag and drop or browse the Use-Case Icon from your local files and upload it.
Under the Workflow 1 panel, enter the Workflow Name. The Description is optional.
Note
User Management workflow is pre-configured under the User Management use case, so the option to map the other workflow will not be available.
Right Column
Edit Use Case
You can view the preview of the User management tile.
Click the All
 button to return to the Use-Cases tab. If you make any changes and click the All button before saving, the system will prompt you to either Save Changes or Discard Changes.
Preview
View how the user management will appear in the Portal in the Preview section.
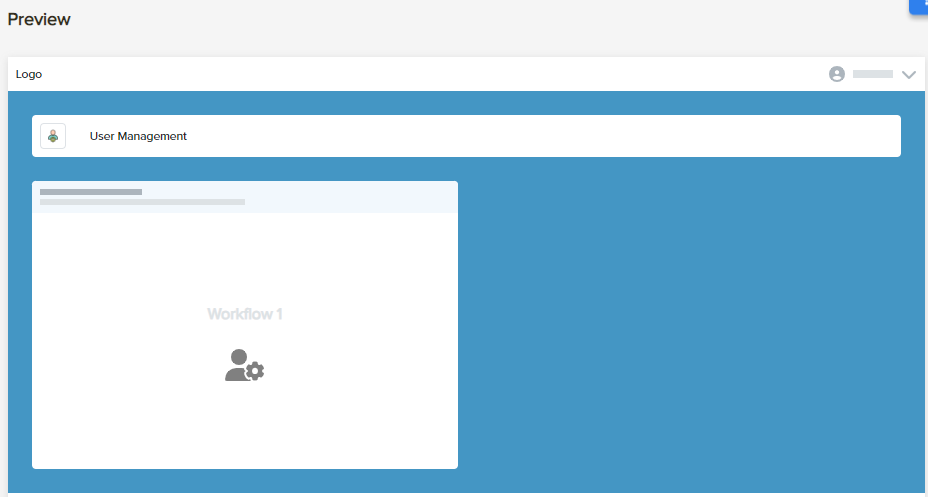
Once the User Management configuration is complete, it will be available on the Portal dashboard.
Assign Permissions to External Admins
To allow an External Admin to add users on the Ushur hub, assign the permission by following the below steps:
Go to the Roles and Users tab.
Click the + Add button and select the Role option.
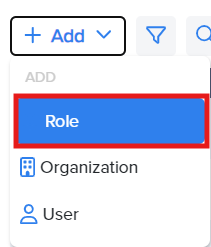
View the list of roles in the summary table.
To add a new role, refer to the Add Roles section.
Or select the applicable role from the summary table.
On the next page, select the + Permission option.
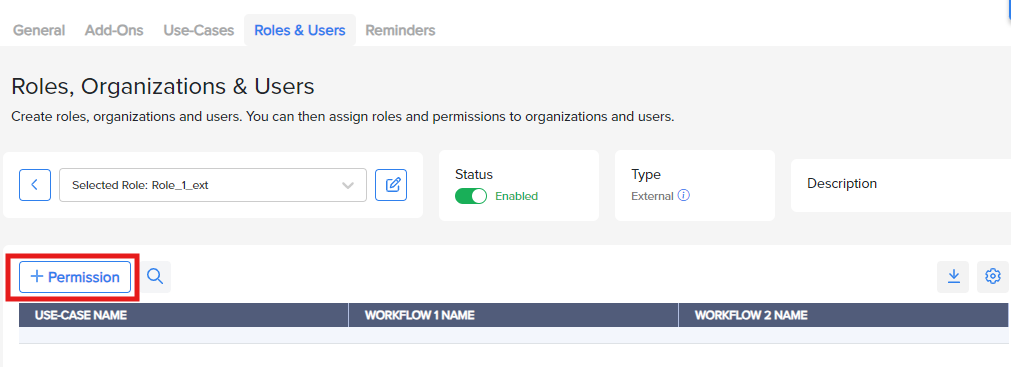
In the Add Permission modal:
Choose User Management from the Use-Case dropdown menu.
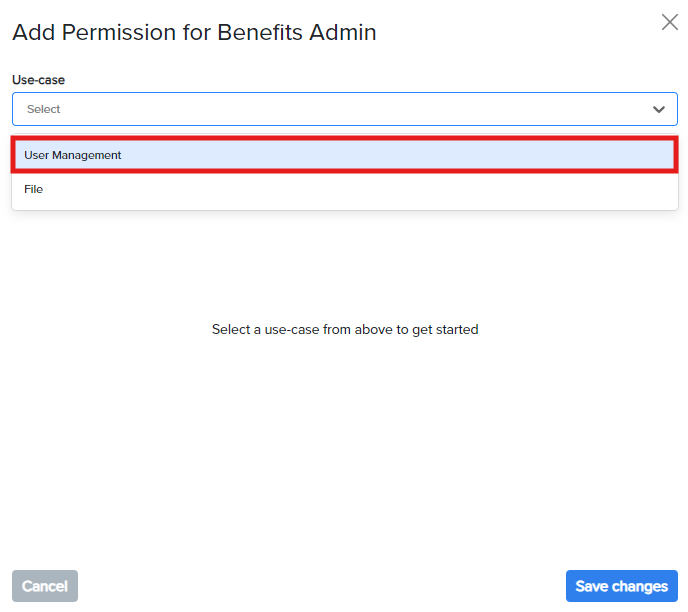
Select the appropriate Permission level from the dropdown menu:
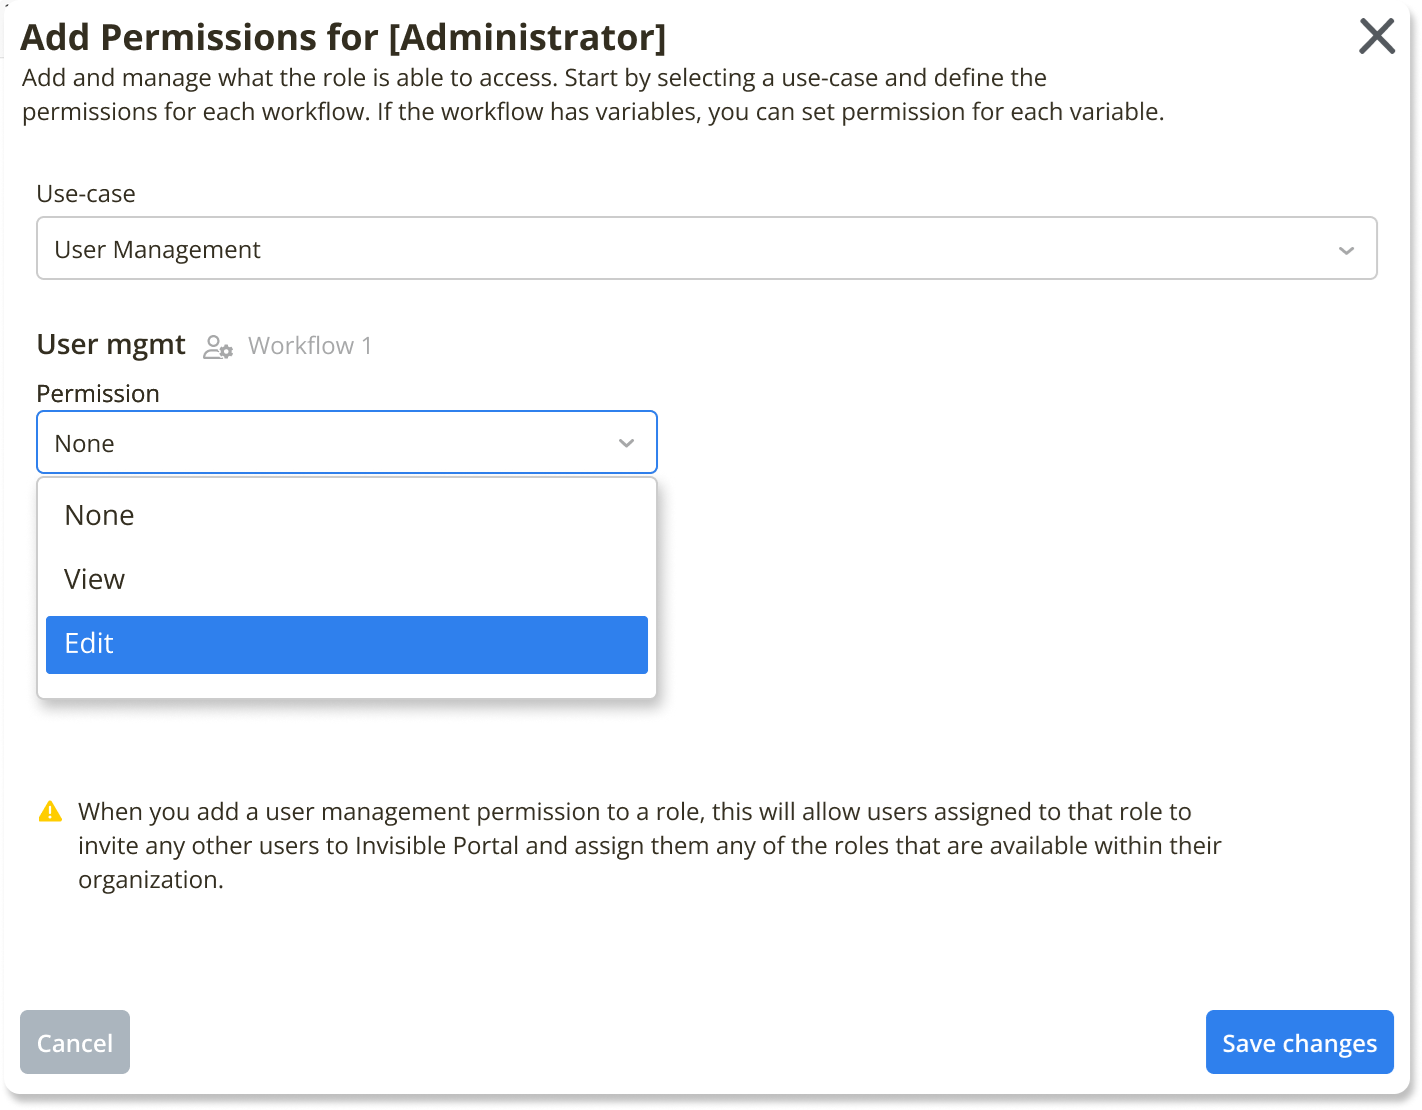
None: The role cannot access this permission.
View: The role can view users but cannot add or edit them.
Edit: The role can perform all CRUD (Create, Read, Update, Delete) functions.
Note
Adding user management permission to a role allows users assigned to that role to invite other users to Ushur Hub and assign them roles available within their organization.
Click Save Changes.
Access User Management in the Portal
Admins with the necessary permissions can access User Management in two ways:

Click the User Management tile on the right panel of the Portal dashboard.
Click the Profile icon at the top-right of the screen and select the User Management option.
Note
On the User Management page, internal admins can select the applicable organization to view users from the Organization dropdown menu.
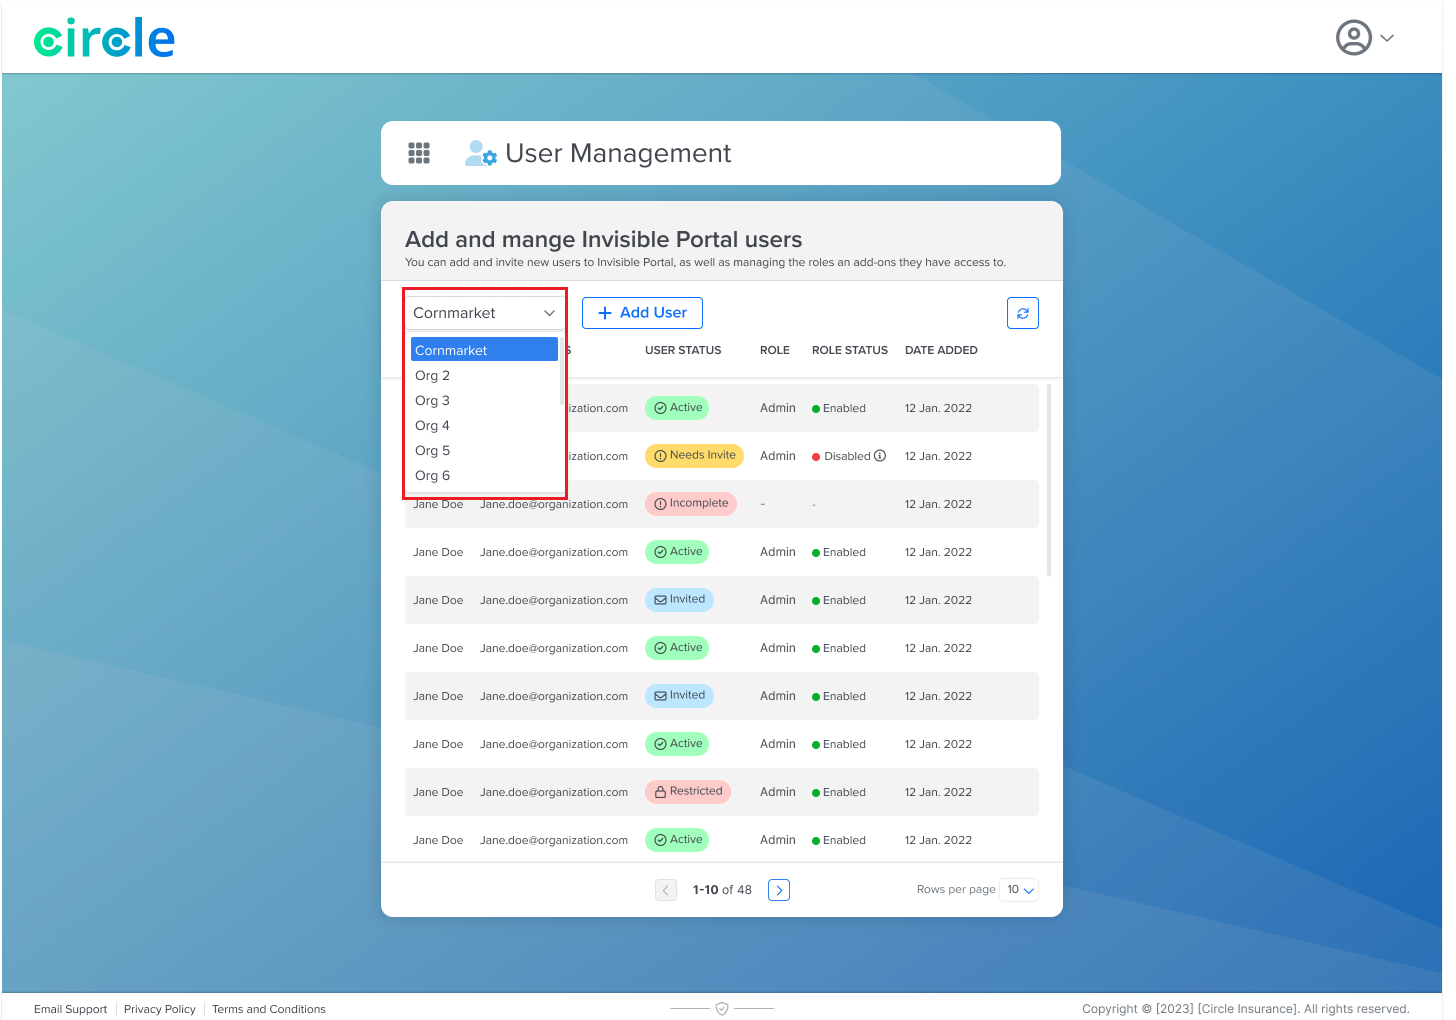
The organization dropdown menu is only available to internal admins, not to external admins.
Add User
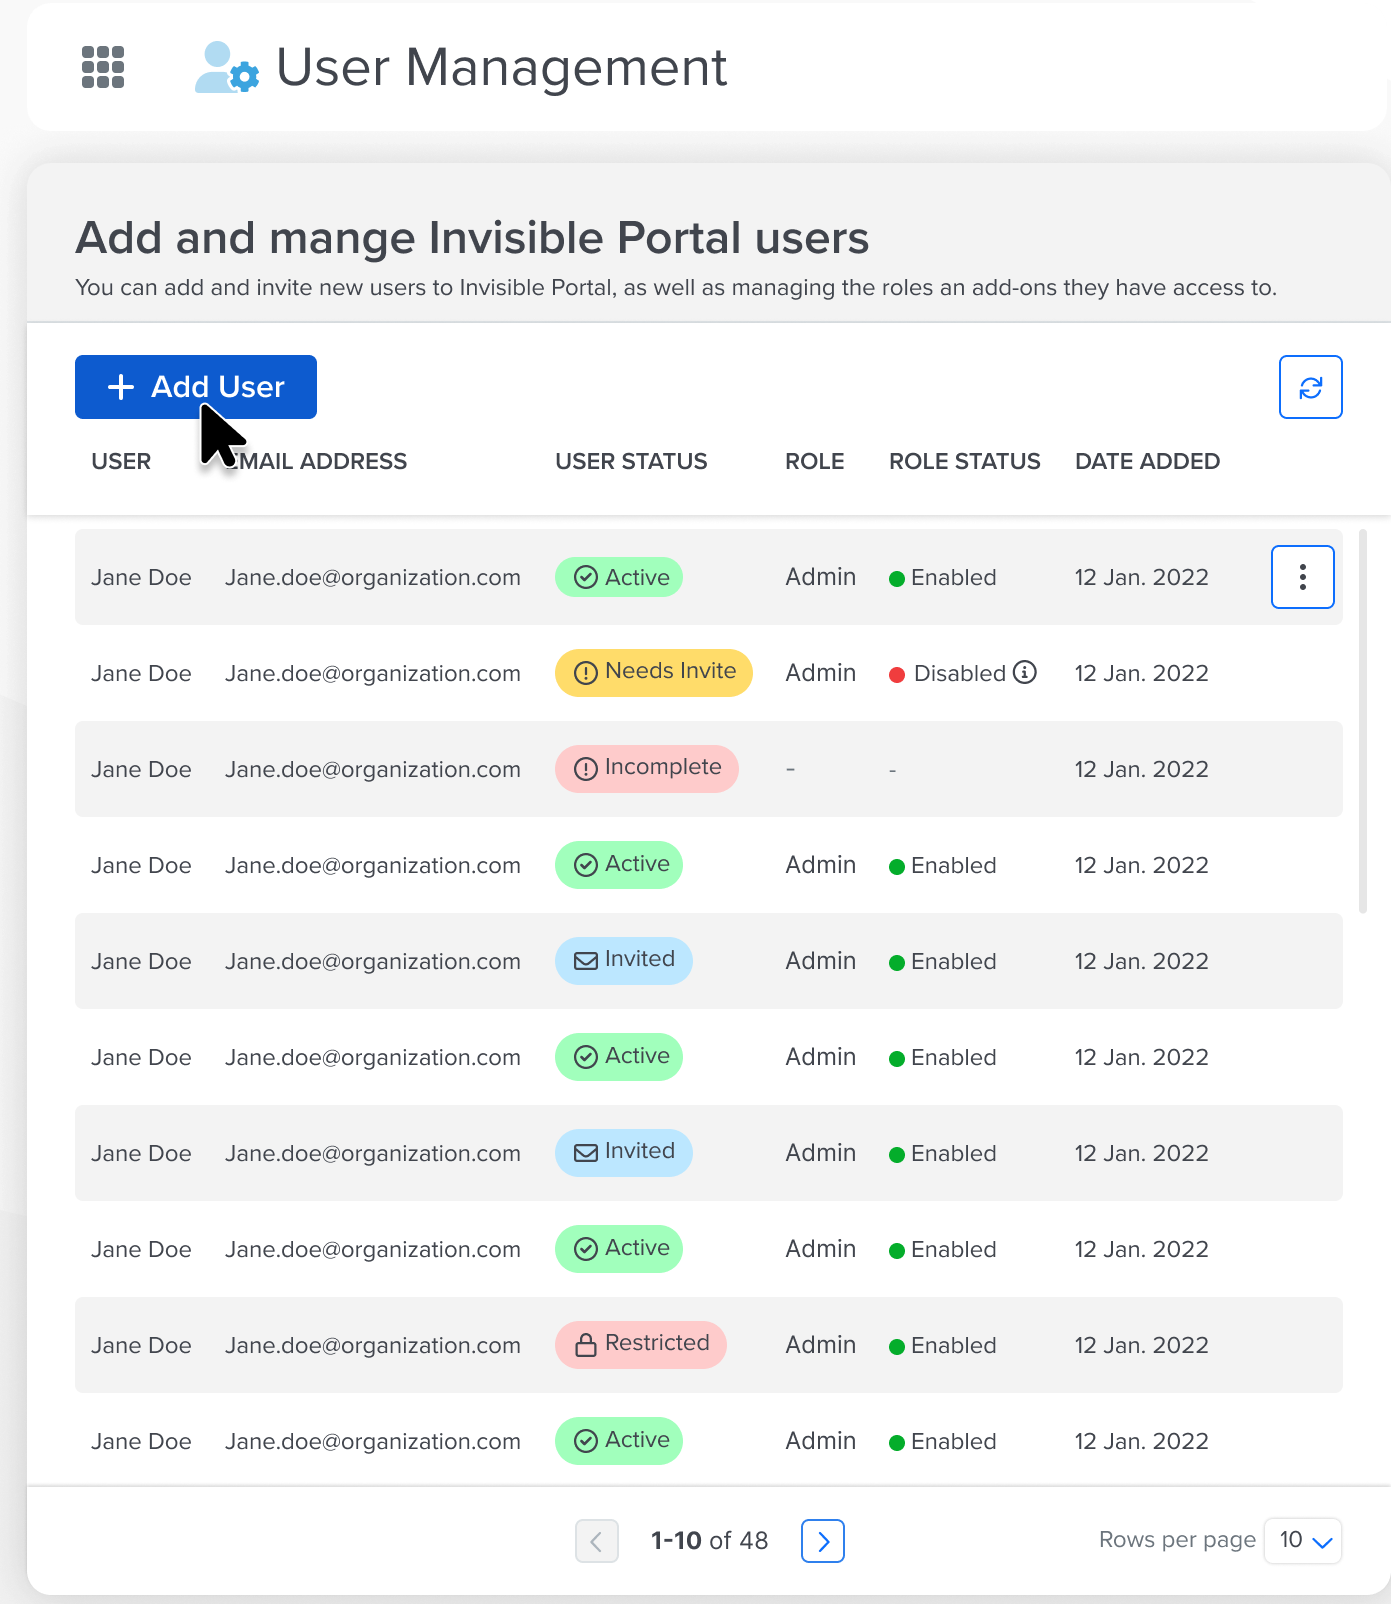
Click the Add User button.
Enter the following details to add a new user:
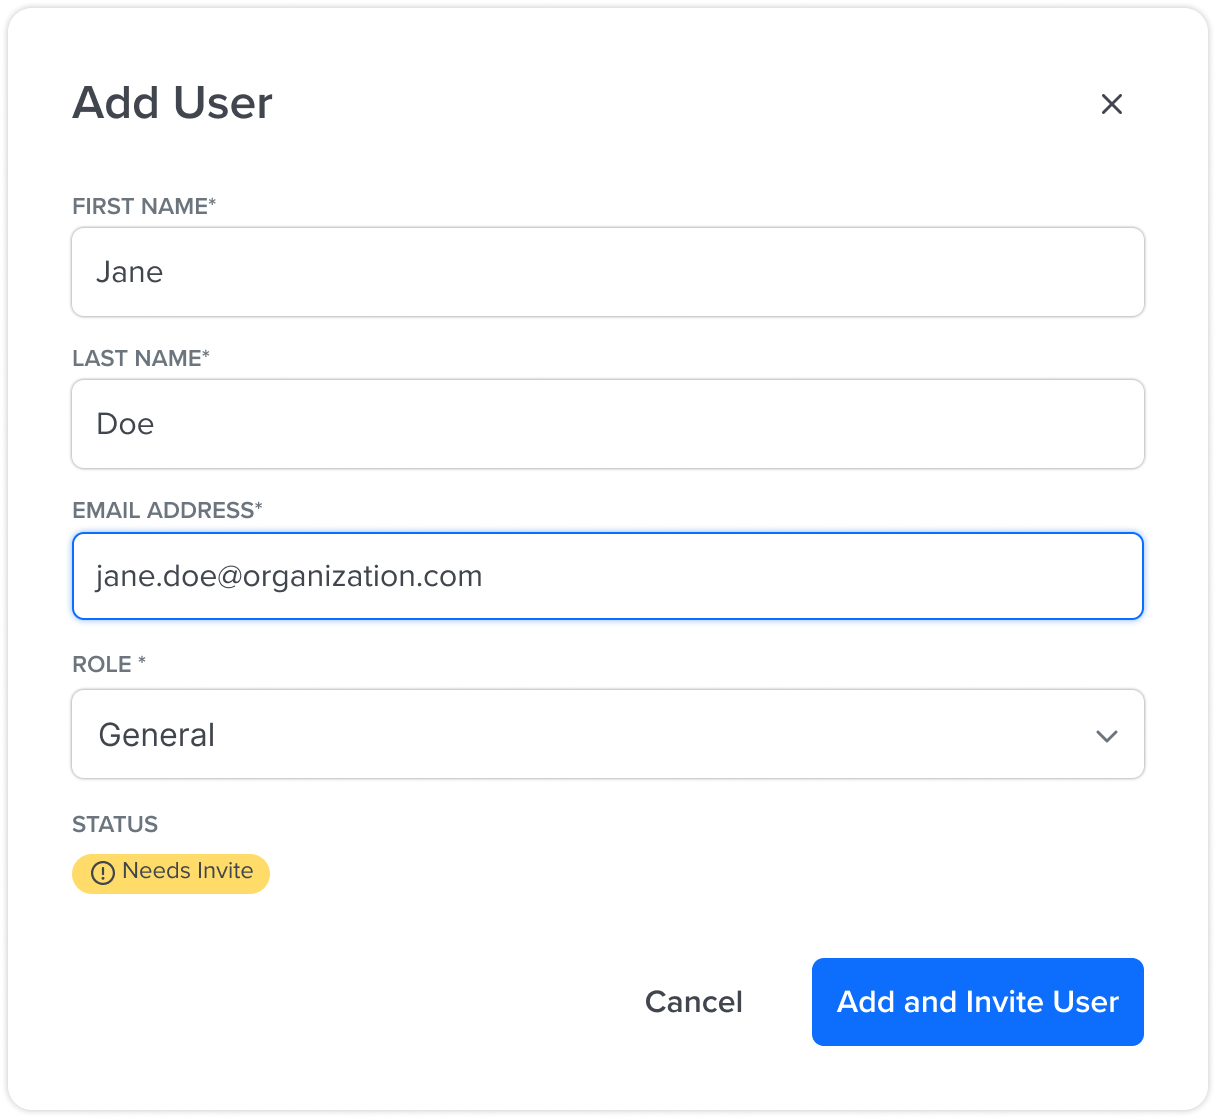
First Name
Last Name
Email Address
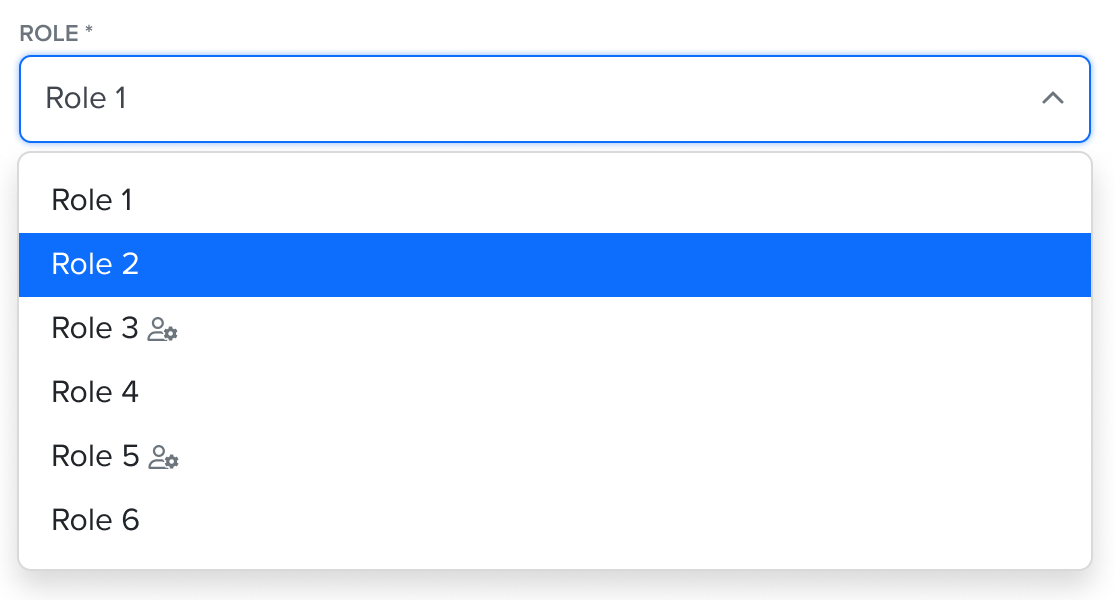
Role: Select the appropriate role from the dropdown menu.
Notes
Internal Admin:
Select a role with the user management permissions marked by the User Management
 icon.
icon.As an Internal Admin, you can view all roles available within the organization to which your role is assigned.
External Admin:
External roles do not have user management permissions.
External Admins can only view and select roles that do not include these permissions.
Roles designated as Internal cannot be selected by external users.
After entering all information, the User Status will display as
 Needs Invite.
Click Add and Invite User. The User Status will then display as
 Invited.
Note
New users are currently added to the middle of the data table. The list is sorted by ID and not by Created On or Updated On.
User Activation
The user will receive an activation email
 .
.The user must click the link and create their account. If registration is not completed, the User Status will show as
 Incomplete.
Once activated, the admin can view the User Status as
 Active.
Edit User Information
Click the user’s row or the more icon and select Edit User.

The admin can:
Update the user information.
Use the Restrict User
 button to restrict the user from accessing Ushur Hub or Portal using their email address.
To allow access again, click
 Unrestrict User.
If necessary, click Re-Invite User.
Note
Wait at least 10 minutes before resending an invitation.
Click the Delete
 icon to remove the user.
Note
Deleting a user permanently revokes all account permissions, and they will be removed from the system.
Unsupported Actions
Bulk User Creation or Deletion
The feature does not support bulk user creation or deletion. Each user must be added or removed individually through the User Management interface.
Purpose-driven guardrail for Assigning Admin Roles
Users with external admin permissions cannot assign a role with admin permissions to other users within their organization. The ability to assign admin roles is restricted to users with an Internal admin user role only.

 button to return to the Use-Cases tab. If you make any changes and click the All button before saving, the system will prompt you to either Save Changes or Discard Changes.


 Incomplete.