- Print
- DarkLight
- PDF
The Launch Engagement tab in Ushur Studio empowers users to initiate tailored engagements with selected groups or individuals. It offers a user-friendly interface for choosing workflows, and communication channels, scheduling a launch, and managing recipient groups. With the ability to build a list of target recipients and launch or schedule the engagement, this feature simplifies the process of sending out targeted communications from a central hub.
.png)
To launch an engagement follow the steps mentioned below:
From the left pane, navigate to Automation > Launchpad to view the page.
.png)
On the Launchpad page, select the Launch tab.
In the Ready to Launch panel, select the Workflow from the drop-down. Only the published workflows will be displayed under their respective project name. The drop-down displays the active legacy workflows as well.
.png)
From the Channel drop-down, select the channel through which the engagement will be launched:
Text (SMS)
Voice
WhatsApp
Note
To enable Voice and WhatsApp channels, contact your Customer Support Manager.
From the Group drop-down, select the group you wish to send the engagement. This will display all the contact details of the group on the right pane in a tabular column:
.png)
Name
Number
Email
Address
Group
To avoid sending the engagement to particular contacts within the group, use the checkbox to select the contacts and click Remove recipient.
.png)
Note
You can send the engagement to a maximum of 2500 contacts at a particular time. If there are more contacts, an error message in red will be displayed. All these options are captured in the screen below.
To change the contact group from the currently selected group, select the applicable group from the Group drop-down and click Replace in the confirmation dialog box.
.png)
Click Launch Engagement and select Yes, Launch in the confirmation dialog box to send the engagement to the contacts group that you have selected.
.png)
Click the Schedule Engagement button to open the scheduling options:
.png)
Date: Select the applicable date from the calendar menu.
Time: Select the applicable time (HH:MM (AM/PM)) at which the engagement should be initiated.
Timezone: Select the applicable time zone from the dropdown menu.
Click the Schedule Launch button to finalize the scheduling of your engagement.
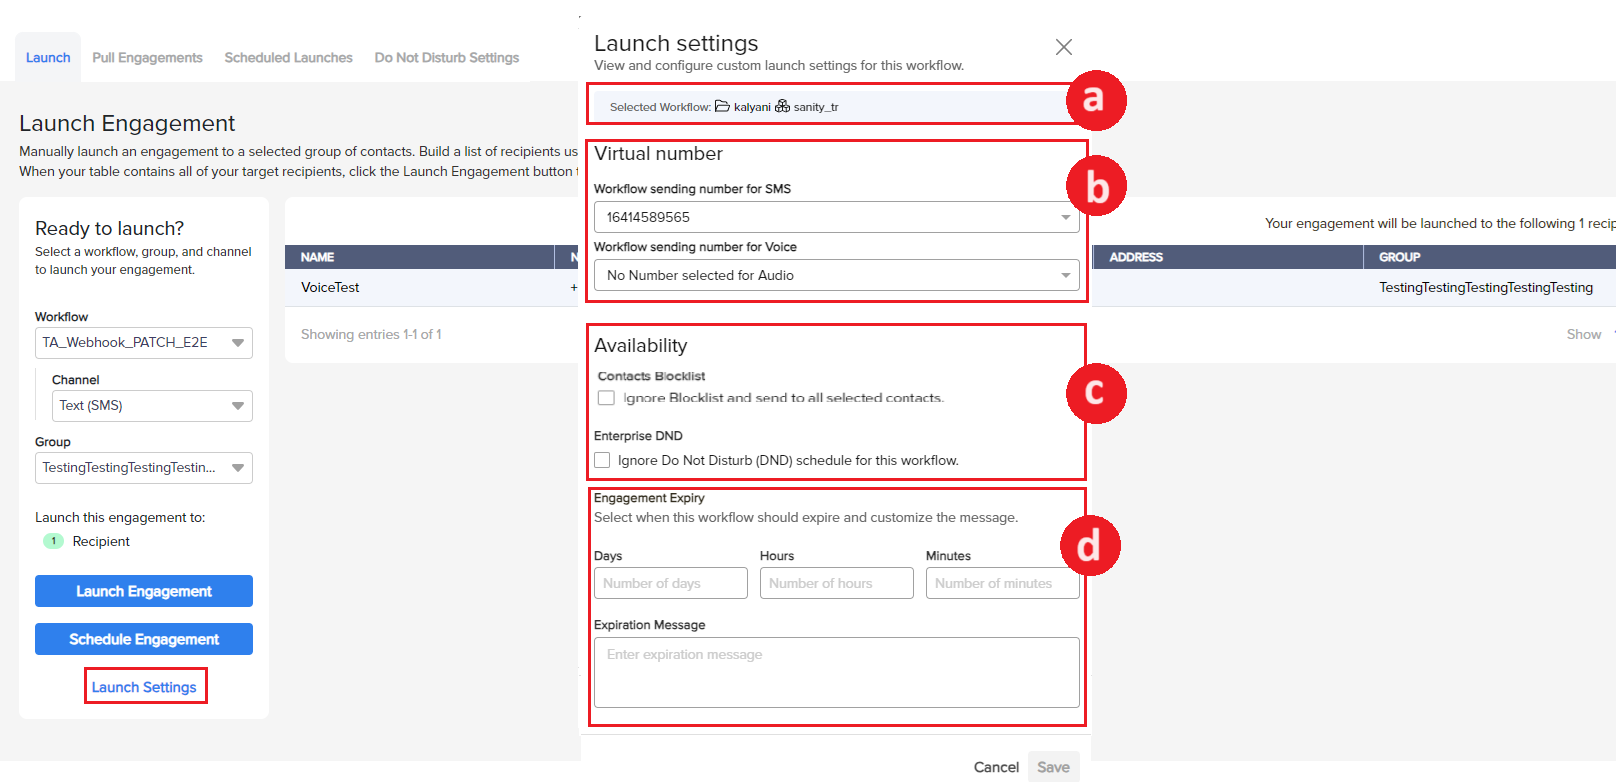
To view and configure the custom Launch Settings for the current workflow, the procedure is as follows:

Selected Workflow: Displays the selected project and workflow details.
Select Virtual Number:
From the Workflow sending number for SMS dropdown, select the applicable phone number from which the workflow will be sent via SMS.
From the Workflow sending number for Voice dropdown, select the applicable phone number from which the workflow will be sent via Voice.
If the Voice number is already associated with another workflow, there will be a warning message.
If a phone number is not configured for a voice, then there will be a warning message that reads “This phone number is not available for voice calls, please select a different number.”.
Manage Availability:
Contacts Blacklist: Select the checkbox, if you choose to override the blacklist and send to all selected contacts.
Enterprise DND: Select the checkbox, if you choose to ignore the Do Not Disturb schedule for this workflow, if applicable.
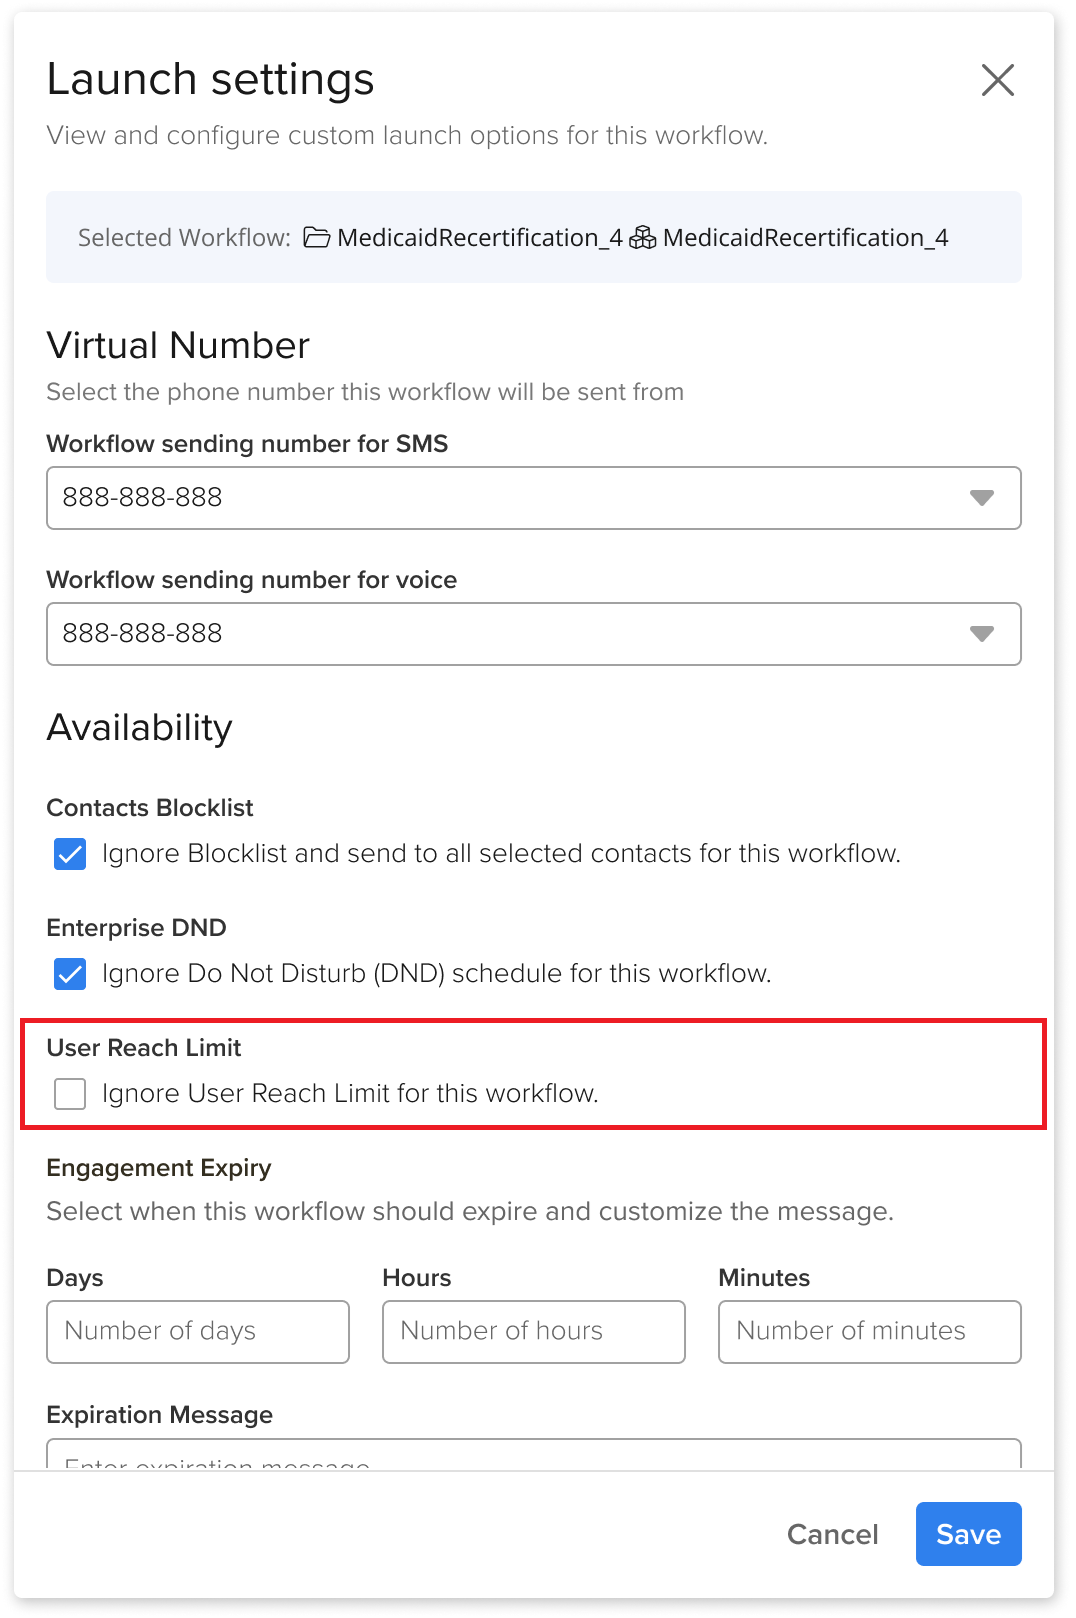
User Reach Limit: Select the checkbox, if you choose to ignore the User Reach Limit for this workflow, if applicable. The option is unchecked by default.

Note
User Reach Limit is an enterprise setting, please contact your customer success team or SRE to configure.
Set Engagement Expiry:
Select the duration after which the workflow should expire by entering the number of days, hours, and minutes.
Enter an expiration message that will be sent once the workflow expires.
Click Save to apply the launch settings to your engagement.

.png)
.png)
.png)
.png)
.png)
.png)
.png)

