- Print
- DarkLight
- PDF
How to Export and Import Ushurs?
You can share created Ushurs from one account to another. This means you can get information for another account with all the configurations, variables, features, and settings to a new location. This saves the time and effort of recreating all of it along with the features from scratch. This is particularly useful when you are trying to move the instance from a Quality Assurance (QA) instance to a production instance.
Note
UFO (or Ushur File Object) is the file type for exporting a Ushur.
Export Ushur
To export an Ushur, complete the following:
Select the Ushur and go into the Edit Ushur screen.
This displays the edit screen.
On the top right corner of the screen, click Export Ushur.
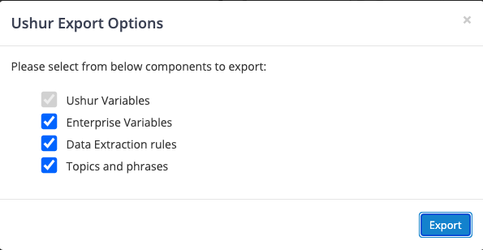
This displays the Ushur Export Options dialog box with the different Ushur components you want to export.
The components include the following:
Note
The export options (components) displayed are based on the components configured in the workflow.
Ushur Variables: Exports specific variables unique to the selected Ushur. (default component)
Enterprise Variables: Exports generic variables across the enterprise.
Data Extraction Rules: Exports rules used to extract data from inputs.
Document Processor Rules: Exports rules for processing documents within the workflow.
Datatable Properties: Exports configurations related to datatables in the workflow.
Topics and Phrases: Exports relevant topics and phrases that are configured in the workflow.
Brand Logo: Exports the workflow’s designated logo for consistent branding across environments.
Click Export.
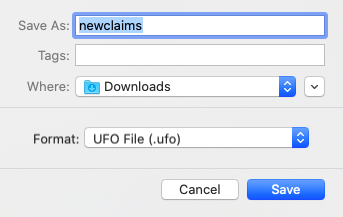
This displays the Save As dialog box to help you save the Ushur.
Click Save.
This file can then be sent to the account of your choice.
Import Ushur
To import a Ushur, complete the following:
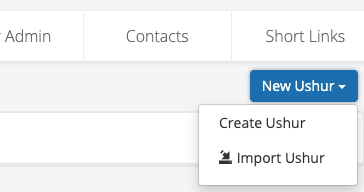
In the Dashboard screen, click New Ushur in the top right corner of the screen.
This displays the option to either create a new Ushur or import an existing one.
Click Import Ushur.
This displays the local browser screen, select the Ushur file (.ufo) that you want to import.After the file is imported, you will receive a confirmation message.
Click OK.
This helps import the Ushur.
Notes
The existing Ushur with the same name cannot be replaced with the Import option. You will need to delete the existing Ushur and then initiate the import action.
Initiated activities from the previous instances or accounts will not appear in the new Ushur location.
An Ushur will be created or can use the existing Application context as captured during the export.
If an existing Ushur needs to be replaced without losing the initiated activities (history of the engagements), get in touch with the Ushur team, to get the migration done without losing data.
LI training needs to be initiated in the new Ushur; every module related to LI needs to be retained.
The export will not copy the following. You can manually update this after the Ushur is copied:
Pull/Push tags
Contacts
Settings
Topics and Phrases (you need to initiate a new training)


