- Print
- DarkLight
- PDF
Introduction
The External Notifications feature allows users to receive immediate alerts when permanent email delivery issues occur within their email engagement campaigns. These notifications are pushed to a user-defined API endpoint, enabling swift actions like updating recipient lists or retrying email sends.
Key Features
API-based Notifications:
Users will be notified immediately when an email fails permanently (e.g., bounced).
Notifications are triggered and sent near real-time to a designated API endpoint, enabling real-time action.
API Integration:
Notifications are delivered directly to a pre-configured API endpoint.
Secure transmission is ensured through API Key Authentication, optionally combined with Basic Authentication (username and password) over SSL or Mutual SSL.
Actionable Alerts:
The alerts provide critical information about failed deliveries, allowing users to make necessary corrections, such as cleaning email lists or attempting alternate communication methods.
Pre-requisites
Setting up Mutual SSL:
The Ushur Platform Admin will:
Set up a self-signed certificate for mutual authentication. This certificate allows the customers to validate the source.
Share the public key certificate via SFTP or other channels for the customer to install on their API Gateway or the server that hosts their API endpoint.
Enable the enterprise setting for "Mutual SSL" in the Ushur platform.
Customer-Side Setup:
Customers should install Ushur’s public key certificate on their API endpoint server.
Enable Mutual SSL on their server to validate the source of incoming requests from Ushur.
The customer must provide a secure API endpoint where the failure notifications will be sent.
Configure External Notifications
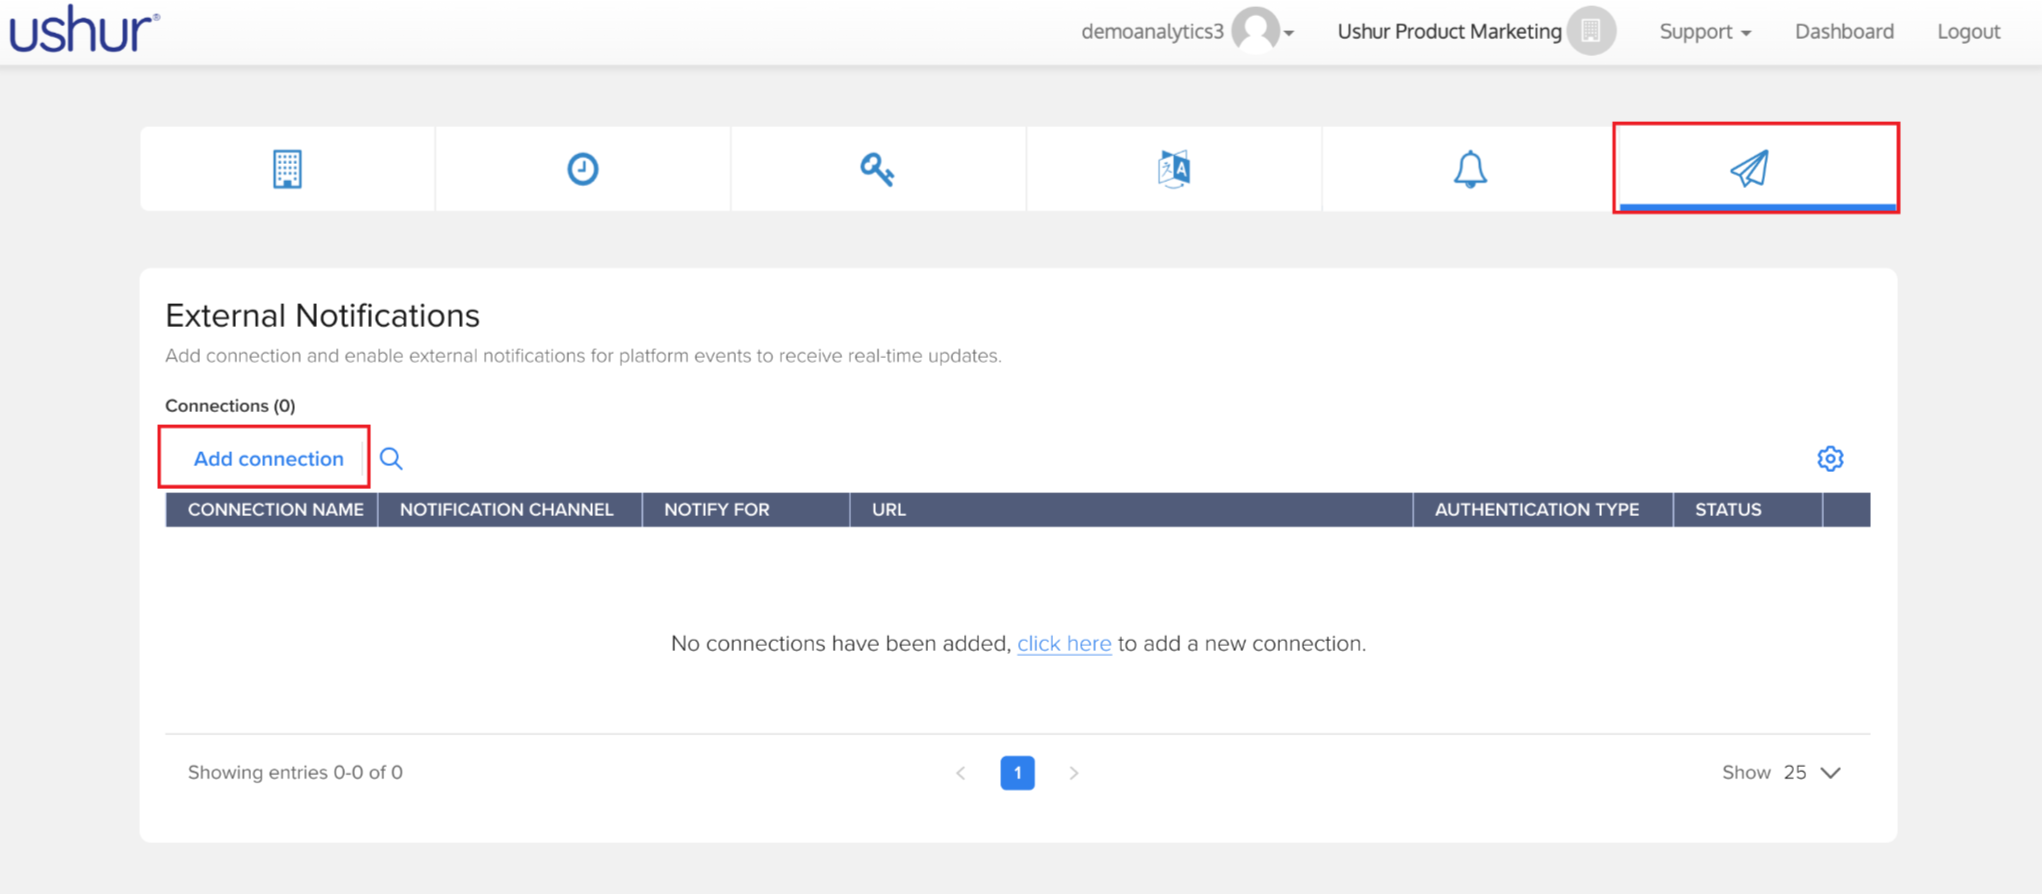
Navigate to External Notifications Settings:

Go to the main dashboard on the Ushur platform.
From the top menu, select Settings.

Click on the External Notifications tab (a paper airplane
 icon).
Add a New Connection:

On the External Notifications page, click on Add Connection (highlighted in blue).
This will open a pop-up form for entering details of the new connection.
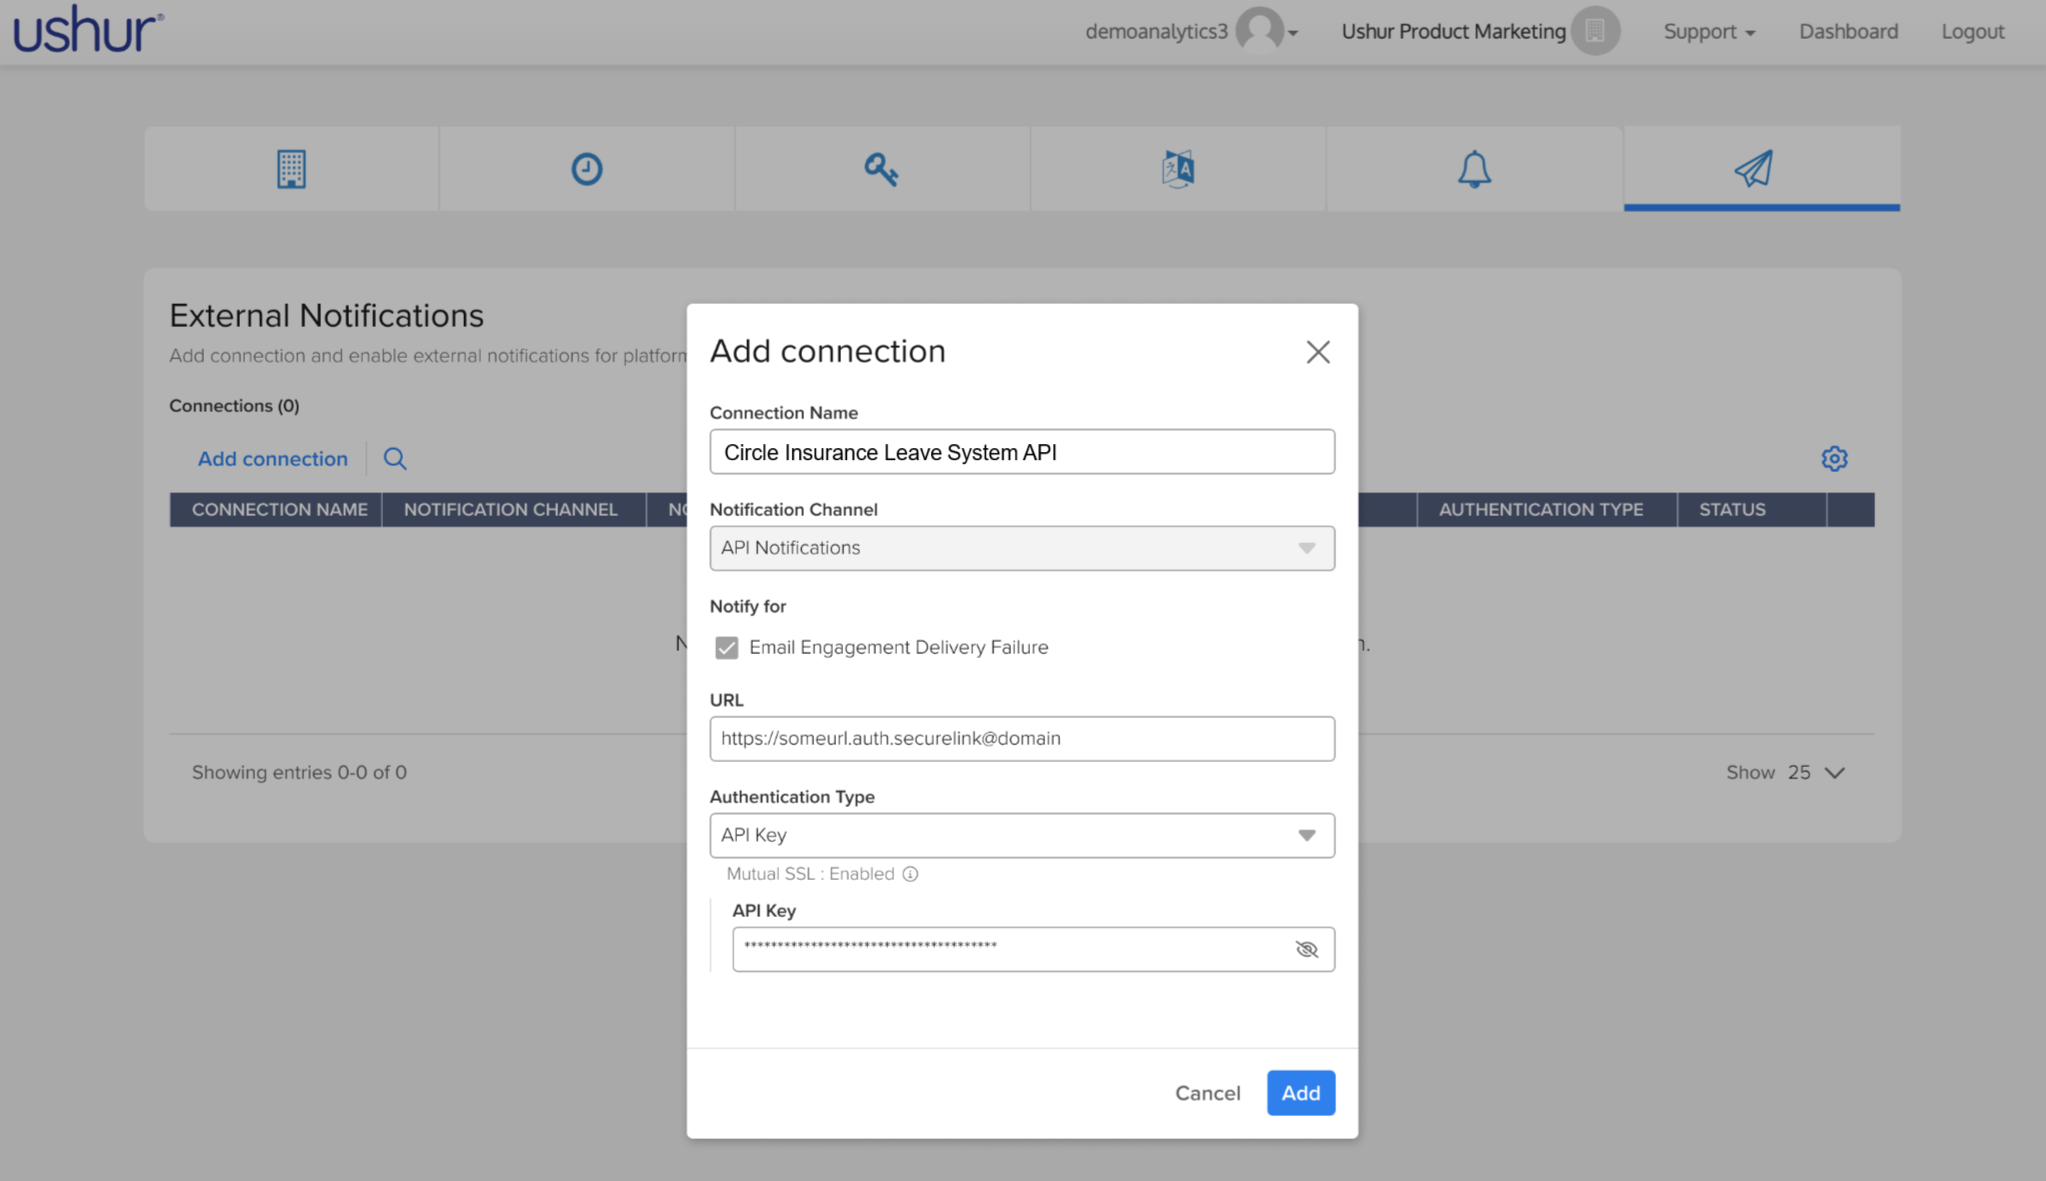
Enter Connection Details:
Connection Name: Provide a recognizable name for the connection (e.g., "Circle Insurance Leave System API").
Notification Channel: API Notifications is selected by default.
Notify For: Email Engagement Delivery Failure Check box is checked by default.
Note
If Email Engagement Delivery Failure is the only option, it is selected by default and cannot be unchecked.
URL: Enter the API endpoint URL provided by the customer where notifications will be sent.
Note
The customer's API endpoint must be up and running at all times to receive real-time API notifications.
Configure Authentication:
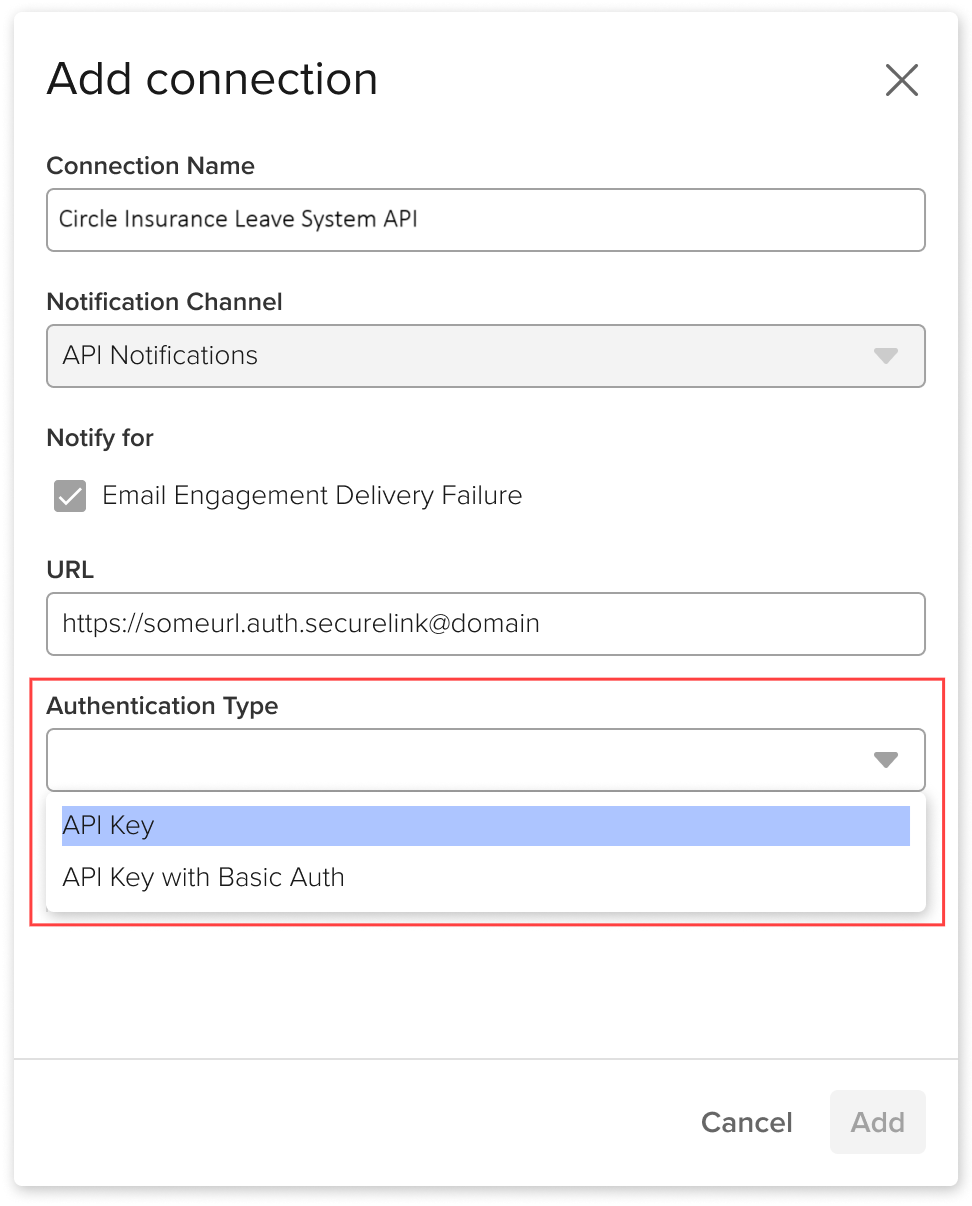
Authentication Type:

Option 1: API Key—You can choose this option if using API Key authentication. Provide the necessary API Key.
Option 2: API Key with Basic Auth—This option requires both an API Key and basic authentication credentials. Enter the Username and Password along with the API Key.

Mutual SSL: The user can view Mutual SSL as Enabled or Disabled.
Complete Setup:
Once all fields are filled in, click Add to save the connection.
The new connection will now appear in the list under External Notifications.
Verify the Connection:
After adding the connection, make sure it is properly listed, and the status shows as Enabled.
Note
Only one connection is allowed per EA account.
Managing Existing Notifications

Edit an Existing Connection
From the External Notifications list, locate the connection you want to edit.
Click the applicable connection from the connection summary table.
Modify the necessary fields such as URL, Notify For, or Authentication Type.
Click Save to apply changes.
Disable a Connection
In the External Notifications list, find the connection you wish to disable.
Click the applicable connection from the connection summary table.
In the Edit Connection modal, use the toggle button to Enable or Disable the connection.
Note
Disabling the notification pauses the real-time alerts without deleting the connection.
Delete a Connection

To permanently remove a connection, click the three-dot menu (⋮) next to the connection, then select Delete.
Confirm the deletion in the prompt that appears. Once deleted, the connection cannot be recovered.


