Email Module
- 15 May 2024
- 2 Minutes to read
- Contributors

- Print
- DarkLight
- PDF
Email Module
- Updated on 15 May 2024
- 2 Minutes to read
- Contributors
- Print
- DarkLight
- PDF
Article summary
Did you find this summary helpful?
Thank you for your feedback

The Email Module enables you to create emails or mailers to send to your users or internal teams. This module enables you to create specific content and designs such as buttons, colors, and links, or use a pre-defined template to send them out as custom emails. You can create emails with specific details. You can type the ‘{{’ double braces to view the list of tags that are available for the module.
To create an Email module, follow the steps below:
From the Modules list, drag and drop the Email Module into the Inspector Panel or double-click to add the module to the step.
Click the module to open the configuration window.
.png "image(91).png")
Edit Step to modify the name and description of the module.
You can specify the following information:
From/Reply-to: The domain name in the From and Reply-to field can now be configured on specific customer requirements. Both email addresses can be customized/white-labeled to one that belongs to the Enterprise so that their customers will recognize a known and trusted email source. Contact your Customer Success Manager to configure your specific domain name for these two fields. This pre-configured domain name will be automatically displayed in these fields. If you edit this with another address that is different from the pre-configured domain name, the following warning message will be displayed.
Recipient Email Address (To): This is the recipient’s email. You can either directly enter the email address or type the variable that contains the recipient’s email address.
CC (Optional): The recipients will receive a carbon copy of the email.
BCC (Optional): The recipients will receive a blind carbon copy of the email.
Email Subject Line: This is the subject line of the email.
Attachment: Enter the tags containing the file you would like to attach. You can select up to 10 tags.
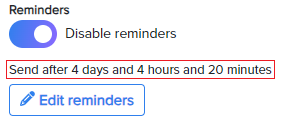
Reminders: The Email module uses the default reminder from the workflow settings, refer to General Tab.
.png "image(92).png")
To customize reminders for the Email module, click Edit Reminders.
Reminder message: Specify the message.
Max Reminders: Specify the maximum number of reminders from the drop-down. The maximum number of reminders is 5.
Send Reminder After: Specify the time of Day, Hours, and Minutes when the reminder will be sent to the user.
On Reminder, branch to:
Select the workflow to proceed with once a reminder is triggered.
To create a new step, click New Step.
After final reminder, branch to:
Select the workflow module to continue after the final reminder is triggered.
To create a new step, click New Step.
Click Save.
The frequency of the reminder will be displayed under the toggle button.
Email Body: This is the text body of your email. Click the Edit Email body to view the screen below. You can edit using the Custom HTML option too. The HTML editor is a simple-looking but powerful editor that can beautify emails without needing to code HTML or CSS.
You can insert a picture, insert buttons, hyperlink text, and more with just a few clicks. Advanced users can also input HTML and CSS code, making it more flexible for different usages.
This extra layer of customization makes the HTML editor optimal for composing emails sent to customers. The Preview pane will display how your email body will be displayed. Click Save..png")
.png "image(91).png")
.png "image(92).png")

.png")
Was this article helpful?