- Print
- DarkLight
- PDF
Access Requirements
Admin and SuperAdmin: Full access to view, add, edit, and delete DND settings.
Normal Users: Can view DND settings but cannot add, edit, or delete them.
Overview
The Do Not Disturb (DND) Settings feature allows users to define specific dates or recurring days of the week to prevent notifications or engagements from being triggered during designated hours. This feature is useful in scheduling quiet times during workflows.
Steps to Manage Do Not Disturb (DND) Settings
1. Access the DND Settings Page

Navigate to the Launchpad.
Click on the Do Not Disturb Settings tab.
2. View Current DND Settings
The page displays an overview, including:

Total number of DND restrictions.
Workflows excluded from DND.
Configured time zone (e.g., UTC).
A calendar highlights the days affected by DND.
3. Add a DND Restriction

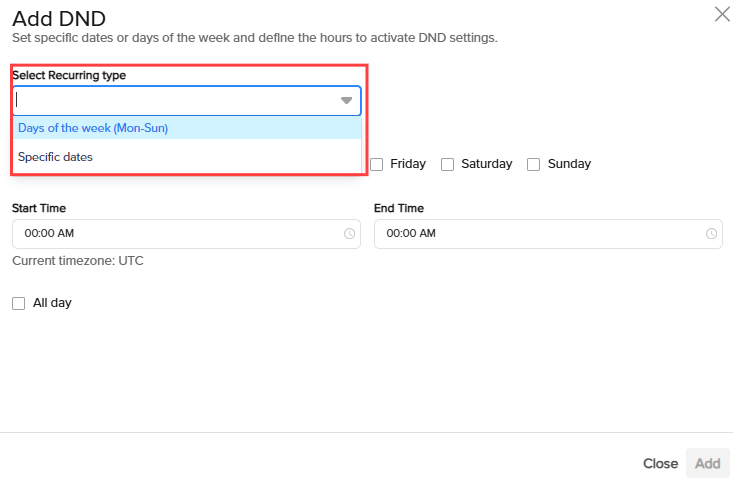
Click the Add DND button to open the dialog box.

Choose the Recurring Type:
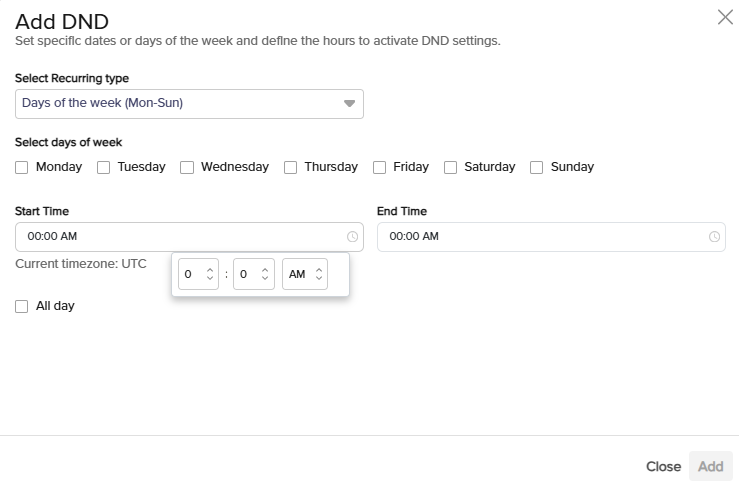
Days of the Week (Mon-Sun):

Select specific days (e.g., Monday, Tuesday).
Define Start Time and End Time in the displayed time selectors.
Check All day if the DND applies for the entire day.
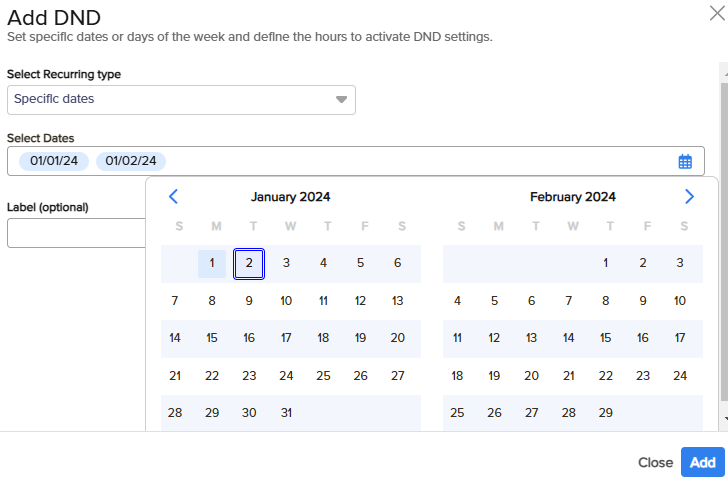
Specific Dates:

Select one or multiple dates on the calendar.
Note
Specific Dates are considered All day by default.
Assign a Label (Optional): Add a descriptive label to identify the DND rule (e.g., "Monday DND hours").
Click the Add button to save the new DND restriction.
4. Edit or Delete DND Restrictions (Admin/SuperAdmin Only)

Locate the desired DND restriction in the list.
Click the applicable DND row to open the Edit DND dialog box.
Update the recurring type, dates, times, or label as needed.
Click Save to apply the changes.
Delete DND Restrictions:
To delete, click the Delete (trash can) icon and confirm.
Click the More
 icon on the restriction in the list and select Delete and confirm.
5. Viewing DND (Normal Users)
Normal users can view:
Configured DND restrictions.
Calendar with highlighted DND dates.
Details of recurring type, dates, times, and labels.
They cannot add, edit, or delete DND rules.


 icon on the restriction in the list and select Delete and confirm.