- Print
- DarkLight
- PDF
Bulk Upload and Triggering Ushurs using the .csv File
Ushur provides a convenient tool to create the .csv template. Using this method helps eliminate errors during creation of the .csv files, especially when there are a large number of columns.
You can upload a maximum of 20 MB files. For a larger file size, we recommend using the SFTP method of file upload.
The bulk upload method addresses the following key information to help manage the triggers:
What are the files which are being triggered?
Who are the recipients of the file?
When are the files triggered?
The bulk upload method ensures that there are checks various levels to avoid automatic triggering of Ushurs and helps monitor and check if you really want to upload the correct files to avoid unnecessary triggering of Ushurs. Do ensure to review the files so that Ushurs are triggered based on a specific time and need.
Prior to uploading the .csv files for triggering the Ushurs, ensure to create the trigger variables.
Note
Trigger variable is a type of variable defined by citizen developers within the Ushur platform that determines the conditions for triggering an engagement.
Login to your account, create and activate an Ushur.
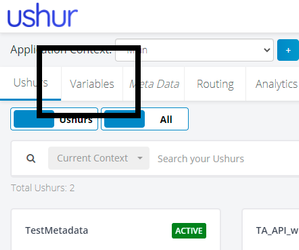
Go to the Variables tab on the Dashboard.
Create the following variables:
PrimaryKey of type uid_sendPrimaryKeyId
TiggerValue of type uid_triggersend
UshurName of type uid_ushurname
Date of type uid_senddate (optional)
If this variable is not created, then Ushurs will be triggered immediately.
Use this field only to schedule Ushurs at a future date.
The values should be provided in “MM/DD/YYYY HH:MM AM/PM” format only.
PhoneNumber of type uid_sendPhoneNo (optional).

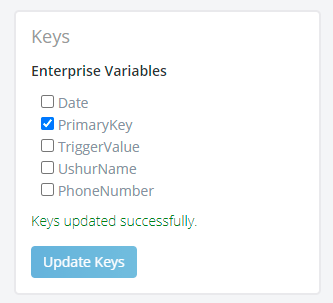
On the left side, tick the checkbox against PrimaryKey and click Update Keys.
From the Meta Data tab, click on Example Files, open and edit the downloaded CSV file and save it with the following data.
Date,PrimaryKey,TriggerValue,UshurName,PhoneNumber
03/29/2021 09:15 AM,1,yes,TestMetadata,+91<ph_no>
Drag and drop the .csv file on to the Bulk Upload space. Alternatively, click anywhere in the Bulk Upload space and select the file manually. When editing .csv files, we recommend to use a plain text editor instead of Excel to avoid occasional changes in the field formats.
Click on the Example files and select .csv to refer to a template.

Drag and drop the .csv file in the Bulk Upload pane.
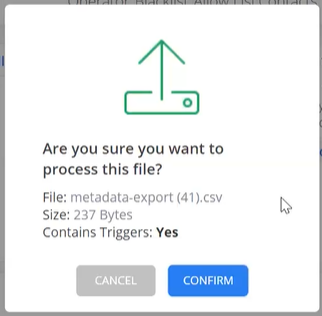
You should see “Contains Triggers=Yes” on this pop-up only if the uploaded file contains the mandatory trigger variables
Click Confirm after you have ensured to upload the correct file. If the upload file contains triggers, it will be displayed in the confirmation dialog box.
The file will be uploaded with this message:
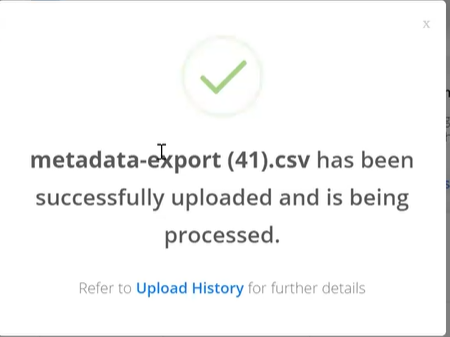
Click the Upload History and view files and its related information.
Analyzing the Upload History of the Meta Data
The Upload History panel, provides detailed information on the bulk files that are uploaded to help view, analyze and take necessary actions.
Access Upload History Panel
Navigate to the Upload History panel to access detailed information on bulk file uploads.View Upload History
Click the View Upload History button to open a dialog box displaying the upload history information.
This panel allows you to view and analyze the details of the uploaded files and take any necessary actions based on the provided information.
Entries Displayed
You can view a maximum of 25 entries in the upload history at one time.
Refresh Data
To ensure that the most recent data is displayed, click the Refresh button. This will fetch the latest information available for upload history.
Filter by Date Range
To view upload history for a specific date range, use the Calendar Icon.
Select the desired date range to filter the upload history accordingly.
Toggle Between Upload Sources
You can toggle between viewing the history of
 UI uploads or SFTP uploads.
Use the toggle option to switch between these two sources of uploads as needed.
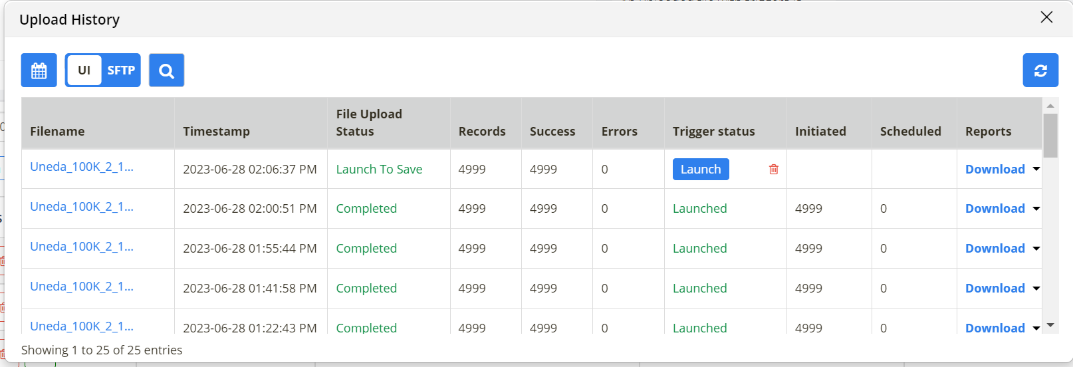
The Delete option is provided as an option to terminate the launch of the triggers in the uploaded file. You can click this if you wish to stall the triggers.
The Upload History panel displays the following information that you can analyze:
Filename - The name of the uploaded file in the .csv file format
Time stamp - The time at which the file was uploaded.
File Upload Status - Displays the status of the file upload.
Launch to Save - Click this to launch and trigger the Ushurs.
Completed - The triggers have been successfully launched and completed.
Errors - Indicates that there were some errors that occurred during the trigger.
Records - Indicates the total number of records that were parsed in the uploaded file.
Success - Indicates that all the records were successfully parsed.
Errors - Indicates format errors in the uploaded file.
Triggered Status - Indicates if the triggers was launched or not.
Initiated - The number of Ushurs launched from these records based on the Ushur Trigger specification.
Scheduled - The number of Ushurs that are executed from these records.
Reports - Provides and an option to download and review the error reports
Click Launch to Save to trigger the Ushur and click Launch in the following dialog box.

Once the triggers are launched and completed, you can click the Download drop-down to view specific information about the files and errors such as such as invalid entry or empty entries in the uploaded file.
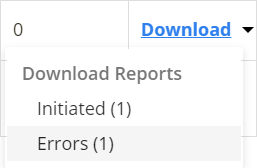
You can download the Reports Error log of these records and it will be saved by default as a .xls file. A sample error log will look like this:


 UI uploads or SFTP uploads.


