AI Skill Module
- 08 Jul 2024
- 4 Minutes to read
- Contributors

- Print
- DarkLight
- PDF
AI Skill Module
- Updated on 08 Jul 2024
- 4 Minutes to read
- Contributors
- Print
- DarkLight
- PDF
Article summary
Did you find this summary helpful?
Thank you for your feedback

The AI Skill Module is a sophisticated tool designed to automate the process of data extraction from various types of documents using pre-trained models. It enables users to choose from a catalog of specialized document skills that correspond to specific types of documents, such as acord forms, driving licenses, and passports, facilitating the precise and efficient retrieval of information.
Users benefit from the module's flexibility in data management; it allows for all extracted data to be consolidated into a single JSON tag, or for each piece of data to be saved to individual tags, thus accommodating a wide range of organizational preferences.
Configure the AI Skill Module
Navigate to the Modules list > DATA> AI Skill Module.
Drag and drop the AI Skill module from the side inspector panel into the Step Logic space. Alternatively, double-click the module.
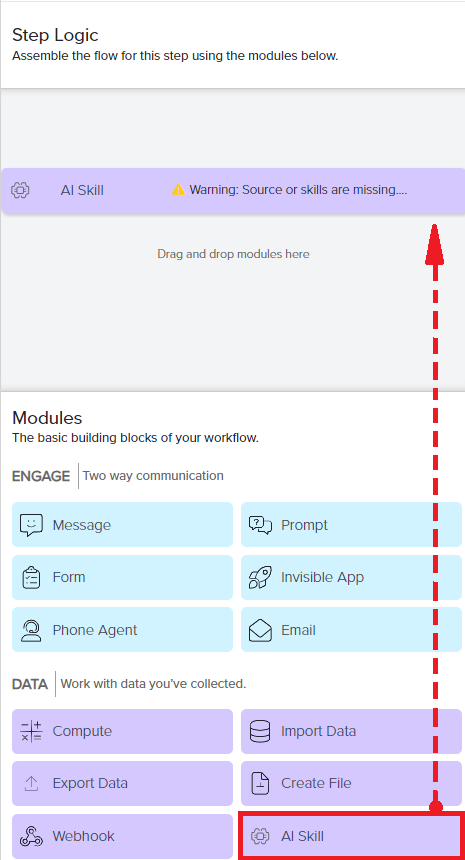
Click the AI Skill module panel to configure.
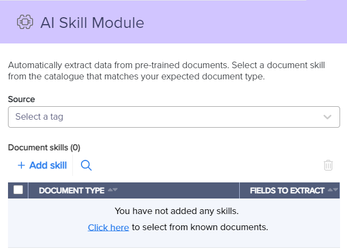
From the Source dropdown, select the appropriate existing tag or click New tag
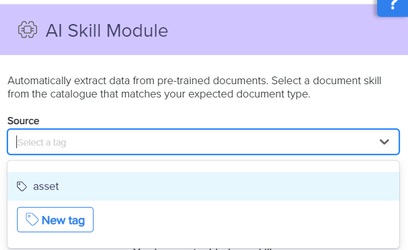
Existing tag: The list of Asset data type tags that are assigned in the File Upload form elements.
New tag:
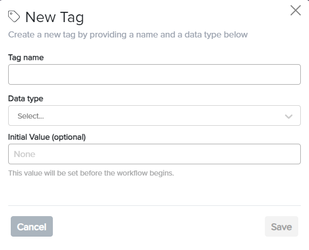
Tag Name: Enter the applicable tag name.
Data Type: The User is allowed only to select the Asset Data data type.
Initial Value (optional): Enter the initial value for the tag. This value will be set before the workflow begins.
Incorporate Document Skill
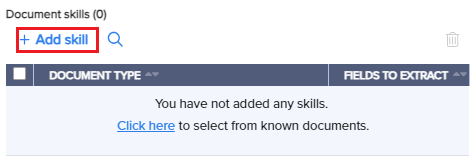
Click on + Add skill to access the skill library.
In the Add Extraction Skill page, Select a pre-trained skill from the Skill Categories dropdown for data extraction, such as:
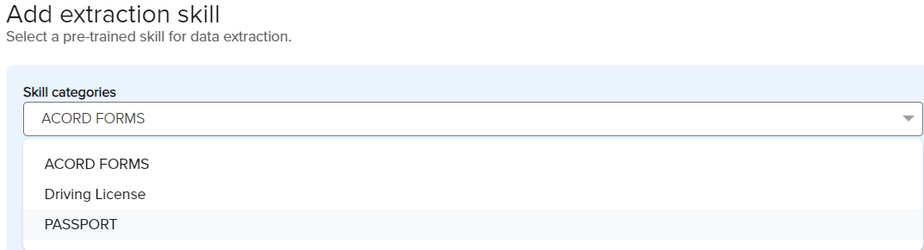
ACORD FORMS
Driving License
PASSPORT.
Choose Specific Skill:
.png "image(115).png")
Once a skill is selected from Skill Categories, the associated skills are displayed in the Skills(#) table.
Select the applicable skill or document type from the table. The preview of the document is displayed in the right panel.
Click Next.
Setting Up Data Extraction:
.png "image(116).png")
On the Data Extraction page, users can view three panels:
Total Pages: Displays the total number of pages available in the document.
Preview Document: Displays the preview of the selected page.
Data Extraction: Displays the options to configure the data storage.
In the Data Extraction panel, the user can configure the data storage and save the data to tags by using the options below:
Save all fields to a single JSON: This option stores all the data in the document including JSON structure, labels, and extracted values to a single JSON.
.png "image(118).png")
Use the check box to select the Save all fields to a single JSON option.
From the drop-down menu, select a tag or create a new tag.
The user is allowed only to select the JSON data type while adding a new tag.
Save extracted values to individual Tags: This option allows the user to store the selected extracted values in individual tags.
.png "image(117).png")
Use the check box to select the Save extracted values to individual Tags option. The Field to Extract table is displayed.
Use the check box to select the applicable field. The corresponding Select a tag field in the SAVE TO column will be enabled.
Select the applicable tag from the drop-down or create a New tag and select.
After selecting the applicable fields, click Finish.


.png "image(115).png")
.png "image(116).png")
.png "image(118).png")
.png "image(117).png")
Note
Clicking on a field in the table highlights its location in the Preview document panel, helping users review it before extraction.
Delete the Document skill:
.png "image(119).png")
Use the check box to select the applicable document skill.
Click the Delete
 icon.
icon.
.png "image(119).png")
Classification Tab
Select the Classification tab.

From the Source dropdown, select the appropriate existing tag(s) or click New tag
Existing tag: Displays the list of Text data types and enterprise tags that are assigned in the ENGAGE modules.
New tag:

Tag Name: Enter the applicable tag name.
Data Type: The User is allowed only to select the Text Data data type.
Initial Value (optional): Enter the initial value for the tag. This value will be set before the workflow begins.
Incorporate Classification Skill:
Click on Select Skill to access the skill library.

In the Add Classification Skill page, Select a pre-trained skill from the list of skills displayed in the Skills(#) table.
The skill table displays the following details:
Skill - Displays the name of the pre-trained skill.
Performance Indicator - Displays the health of the skill. A green indicator signifies a well-performing skill, while a red indicator may denote that skill is underperforming or requires training. Hover the mouse over the bar to view the skill health 100 being the maximum.
Version - Displays the iteration of the skill being trained.
Click the applicable Skills to display the detailed view in the right panel.
Date Created: Display the creation date and time of the skill in the MM/DD/YYYY HH:MM AM/PM format.
Classifier: Displays the type of classifier used.
Note: Provides additional information such as the purpose of the skill or notes on its training dataset.
Classes: Lists the categories that the classifier can sort data into.
Upon selecting the applicable skill, select a pre-existing tag or create a new tag to associate with the classified data from the Save output to drop-down.
Click Finish to save the skill.
Users can assign a single Source tag to a single skill. Assigning multiple source tags to a single skill will be introduced in the upcoming release.
If the user selects the Extraction tab, a warning dialog box will be displayed before proceeding.

Click proceed to switch to the Extraction tab. Note that skills will not be saved under the Classification tab.
To save, click the Back
 button.
Note that only one skill can be applied at a time, and adding a new skill will override the existing one.
Delete the Document skill:
Use the check box to select the applicable skill.
Click the Delete
icon.
From the On Error, Branch to drop-down, select the Next Step or New Step to proceed to when a classification error is encountered.


Was this article helpful?